Configure Notification Hub
published by: Cory Fowler
-
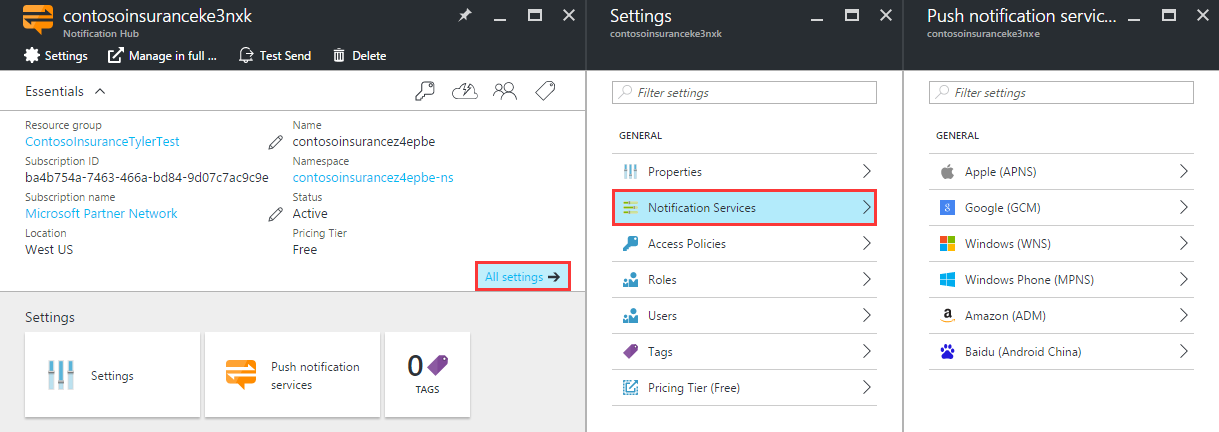
Open the Notification Hub.

-
Click All Settings, then click Notification Services.
-
Configure Google (GCM).
For this step, you need a Google account with a verified email address.
-
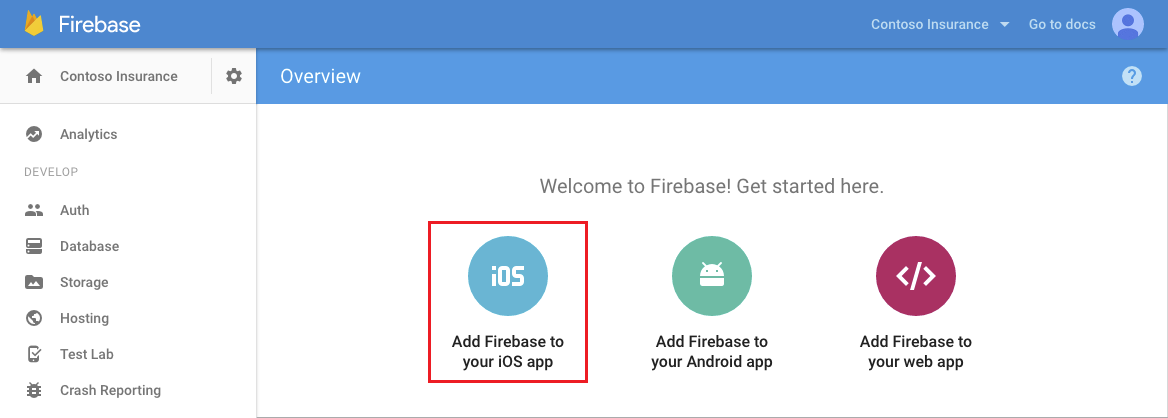
Log in to the Firebase console. Create a new Firebase project if you don’t already have one.
-
After your project is created click Add Firebase to your Android app and follow the instructions provided.
-
Click the cog, then click Project Settings -> CLOUD MESSAGING.
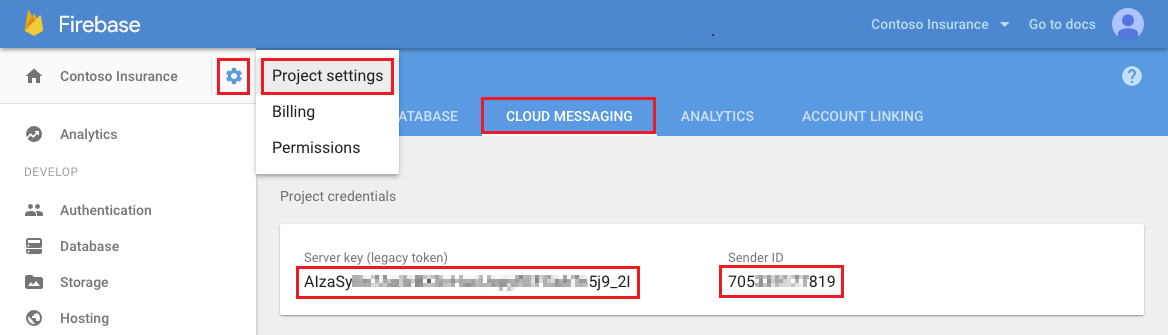
If the page says “Your project doesn’t have a server key”, click Regenerate Key.
Copy the Server key (legacy token).
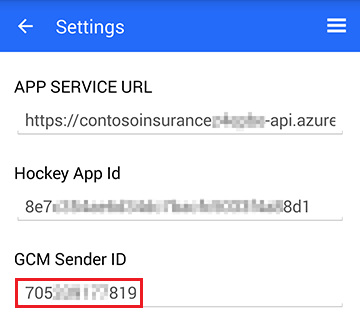
Note: The Sender ID will be used on the Settings page of the Android App.
-
Paste the server key to the API Key input box below.
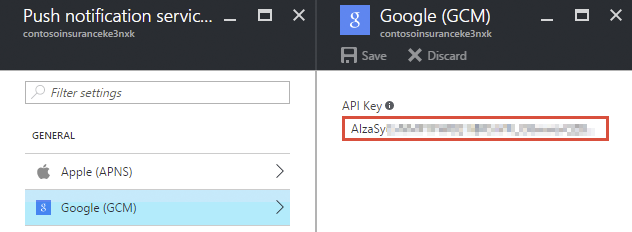
Click Save.
-
-
Configure Apple (APNS):
The iOS simulator does not support push notifications, so for this step, you need a physical iOS device and an Apple Developer Program membership.
-
Register an App ID for your app. Create an explicit App ID (not a wildcard App ID) and for Bundle ID, use the exact Bundle ID that is in your iOS project. It is also crucial that you check the Push Notifications option.
-
Next, configure push notifications. You may create either a “Development” or “Distribution” SSL certificate.
-
On your Mac, launch Keychain Access. Open Category > My Certificates. Find the SSL certificate to export (that you downloaded earlier) and disclose its contents. Select only the certificate without selecting the private key, and export it.
-
Click Upload Certificate. Upload the .p12 push certificate file you exported earlier.
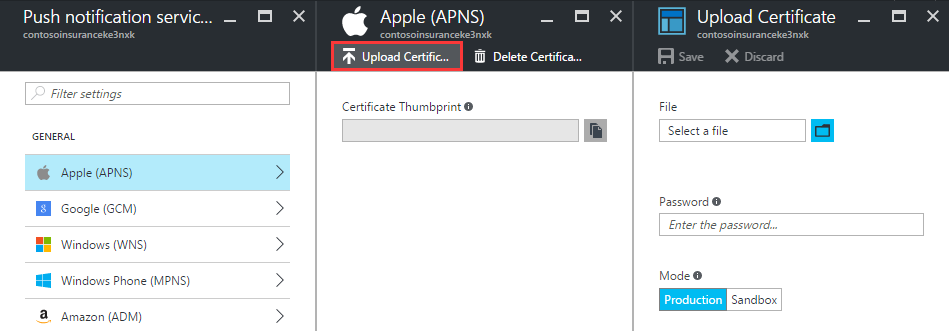
Note: Make sure to select Sandbox if you created a development push certificate for development and testing. Otherwise, choose Production.
-
Click Save.
-