Setup Authentication Providers
published by: Cory Fowler
Register your app with Microsoft Account
This topic is also available on docs.microsoft.com
- Navigate to the My Applications page in the Microsoft Account Developer Center, and log on with your Microsoft account, if required.
- Click Add an app, then type an application name, and click Create application.
- Make a note of the Application ID, as you will need it later.
- Under “Platforms,” click Add Platform and select “Web”.
-
Under “Redirect URIs” supply the endpoint for your application, then click Save.
Note: Your redirect URI is the URL of your application appended with the path, /.auth/login/microsoftaccount/callback. For example,
https://contoso.azurewebsites.net/.auth/login/microsoftaccount/callback.
Make sure that you are using the HTTPS schemeNote: You will need to come back to this step after the deployment is completed to provide the Redirect URI
-
Under “Application Secrets”, click Generate New Password. Make note of the value that appears. Once you leave the page, it will not be displayed again.
Note: The password is an important security credential. Do not share the password with anyone or distribute it within a client application.
Register your application with Azure Active Directory
Note: This topic is also available on docs.microsoft.com
-
Sign in to the Azure classic portal and navigate to Active Directory.
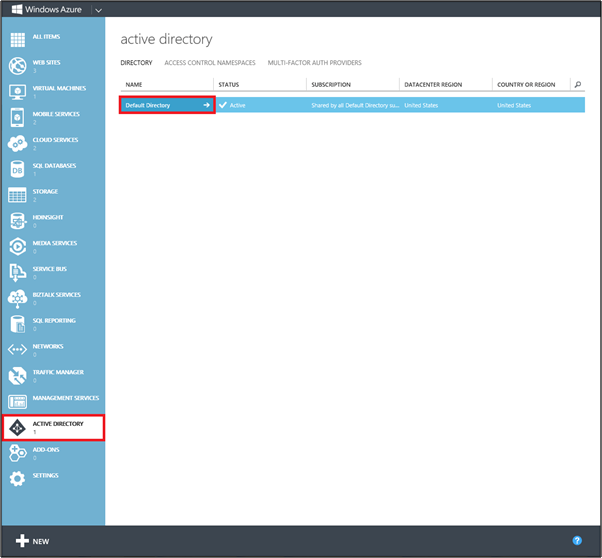
- Select your directory, and then select the Applications tab at the top. Click ADD at the bottom to create a new app registration.
- Click Add an application my organization is developing.
- In the Add Application Wizard, enter a Name for your application and click the Web Application And/Or Web API type. Then click to continue.
- In the SIGN-ON URL box, paste the application URL you copied earlier. Enter that same URL in the App ID URI box. Then click to continue.
-
Once the application has been added, click the Configure tab. Edit the Reply URL under Single Sign-on to be the URL of your application appended with the path, /.auth/login/aad/callback. For example,
https://contoso.azurewebsites.net/.auth/login/aad/callback. Make sure that you are using the HTTPS scheme.Note: You will need to come back to this step after the deployment is completed to provide the Reply URL
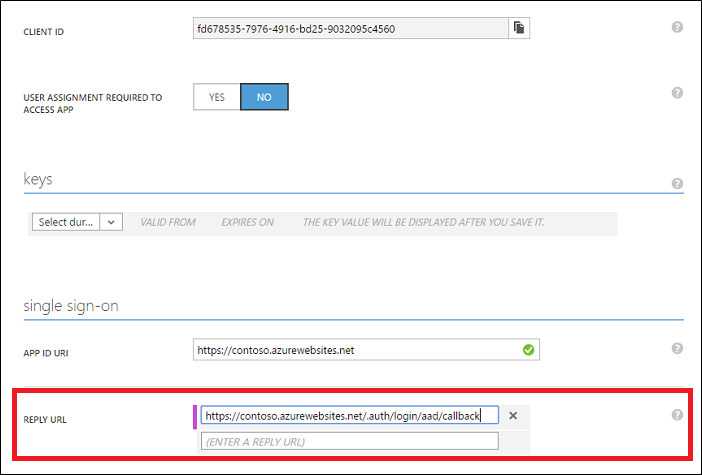
- Click Save. Then copy the Client ID for the app. You will configure your application to use this later.
- In the bottom command bar, click View Endpoints, and then copy the Federation Metadata Document URL and download that document or navigate to it in a browser.
- Within the root EntityDescriptor element, there should be an entityID attribute of the form
https://sts.windows.net/followed by a GUID specific to your tenant (called a “tenant ID”). Copy this value - it will serve as your Issuer URL. You will configure your application to use this later.