Create an API Center Service
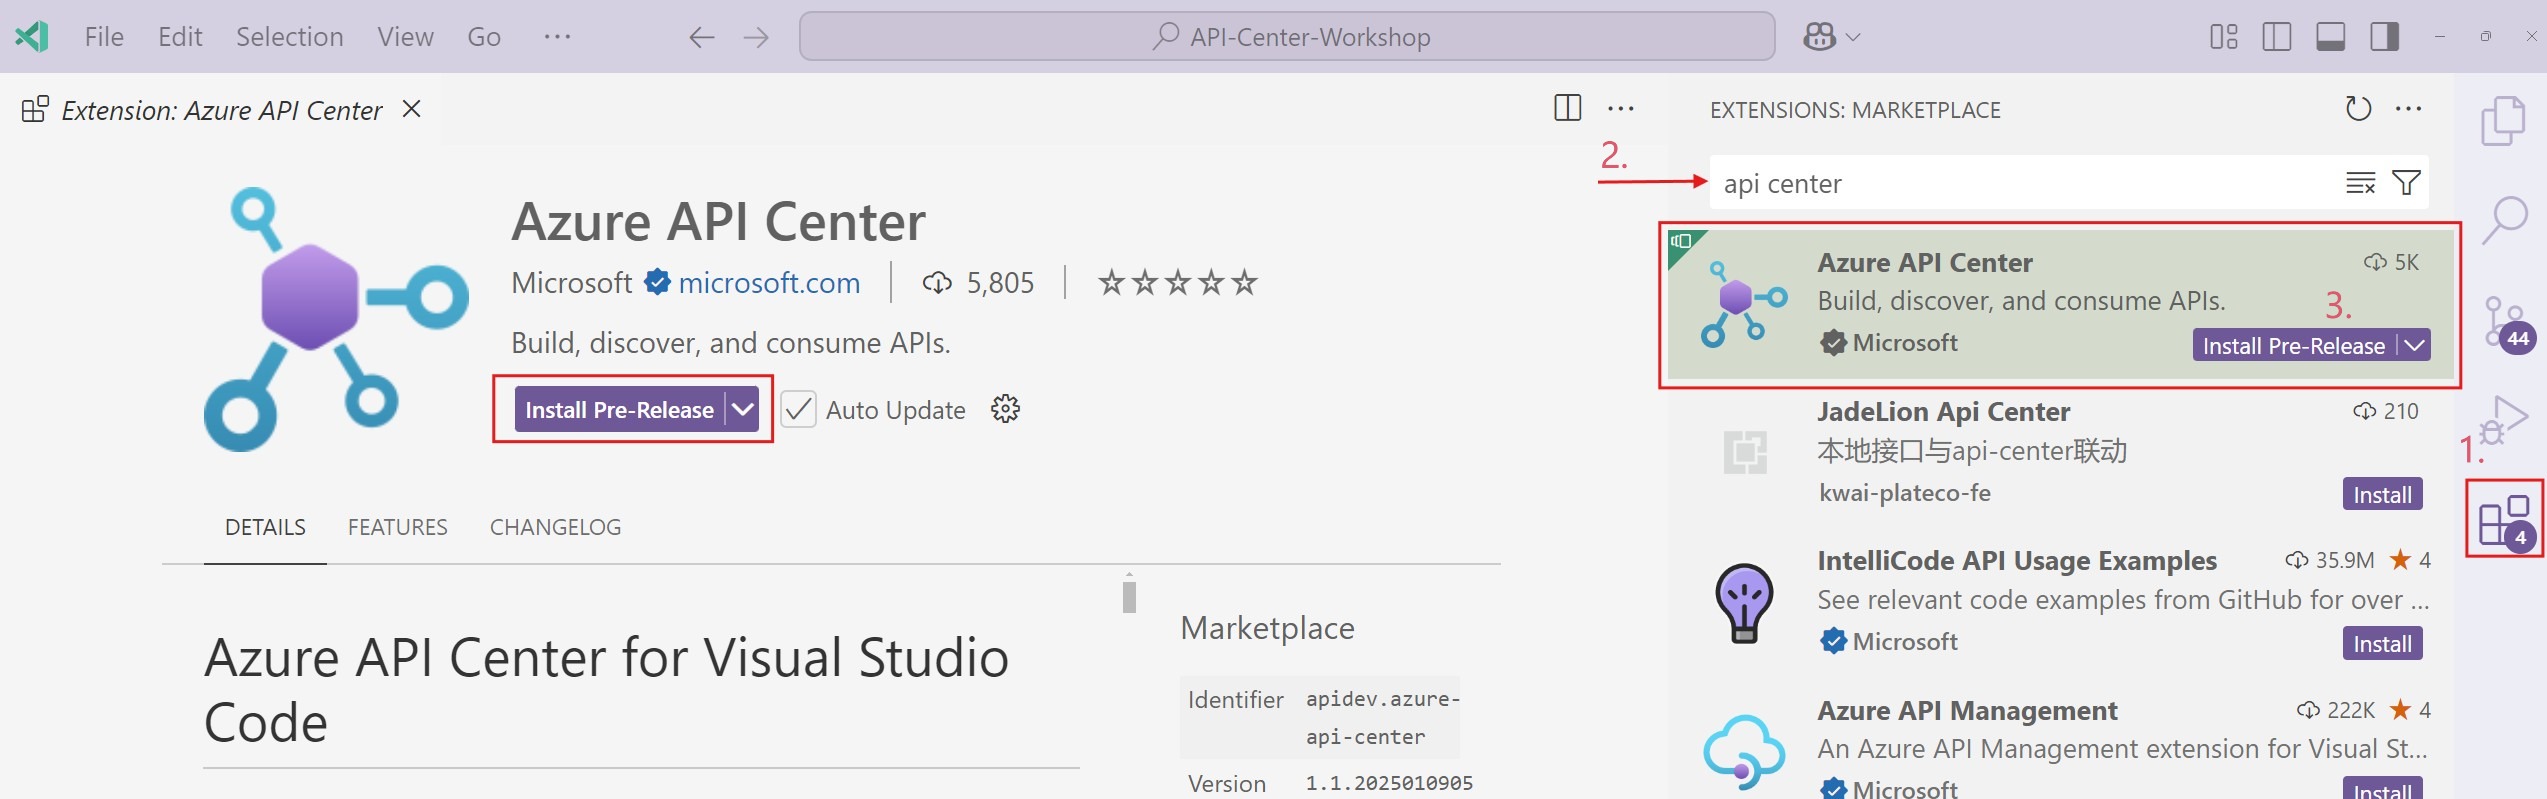
This step uses the Azure API Center VS Code extension. If you haven't installed it yet, you can download it from here. Ensure you install and switch to the Pre-Release version for this workshop.
Click on the Extensions icon in the side bar, and type 'api center' in the search textbox. Click on the Azure API Center extension and click Install Install Pre-Release/ Install
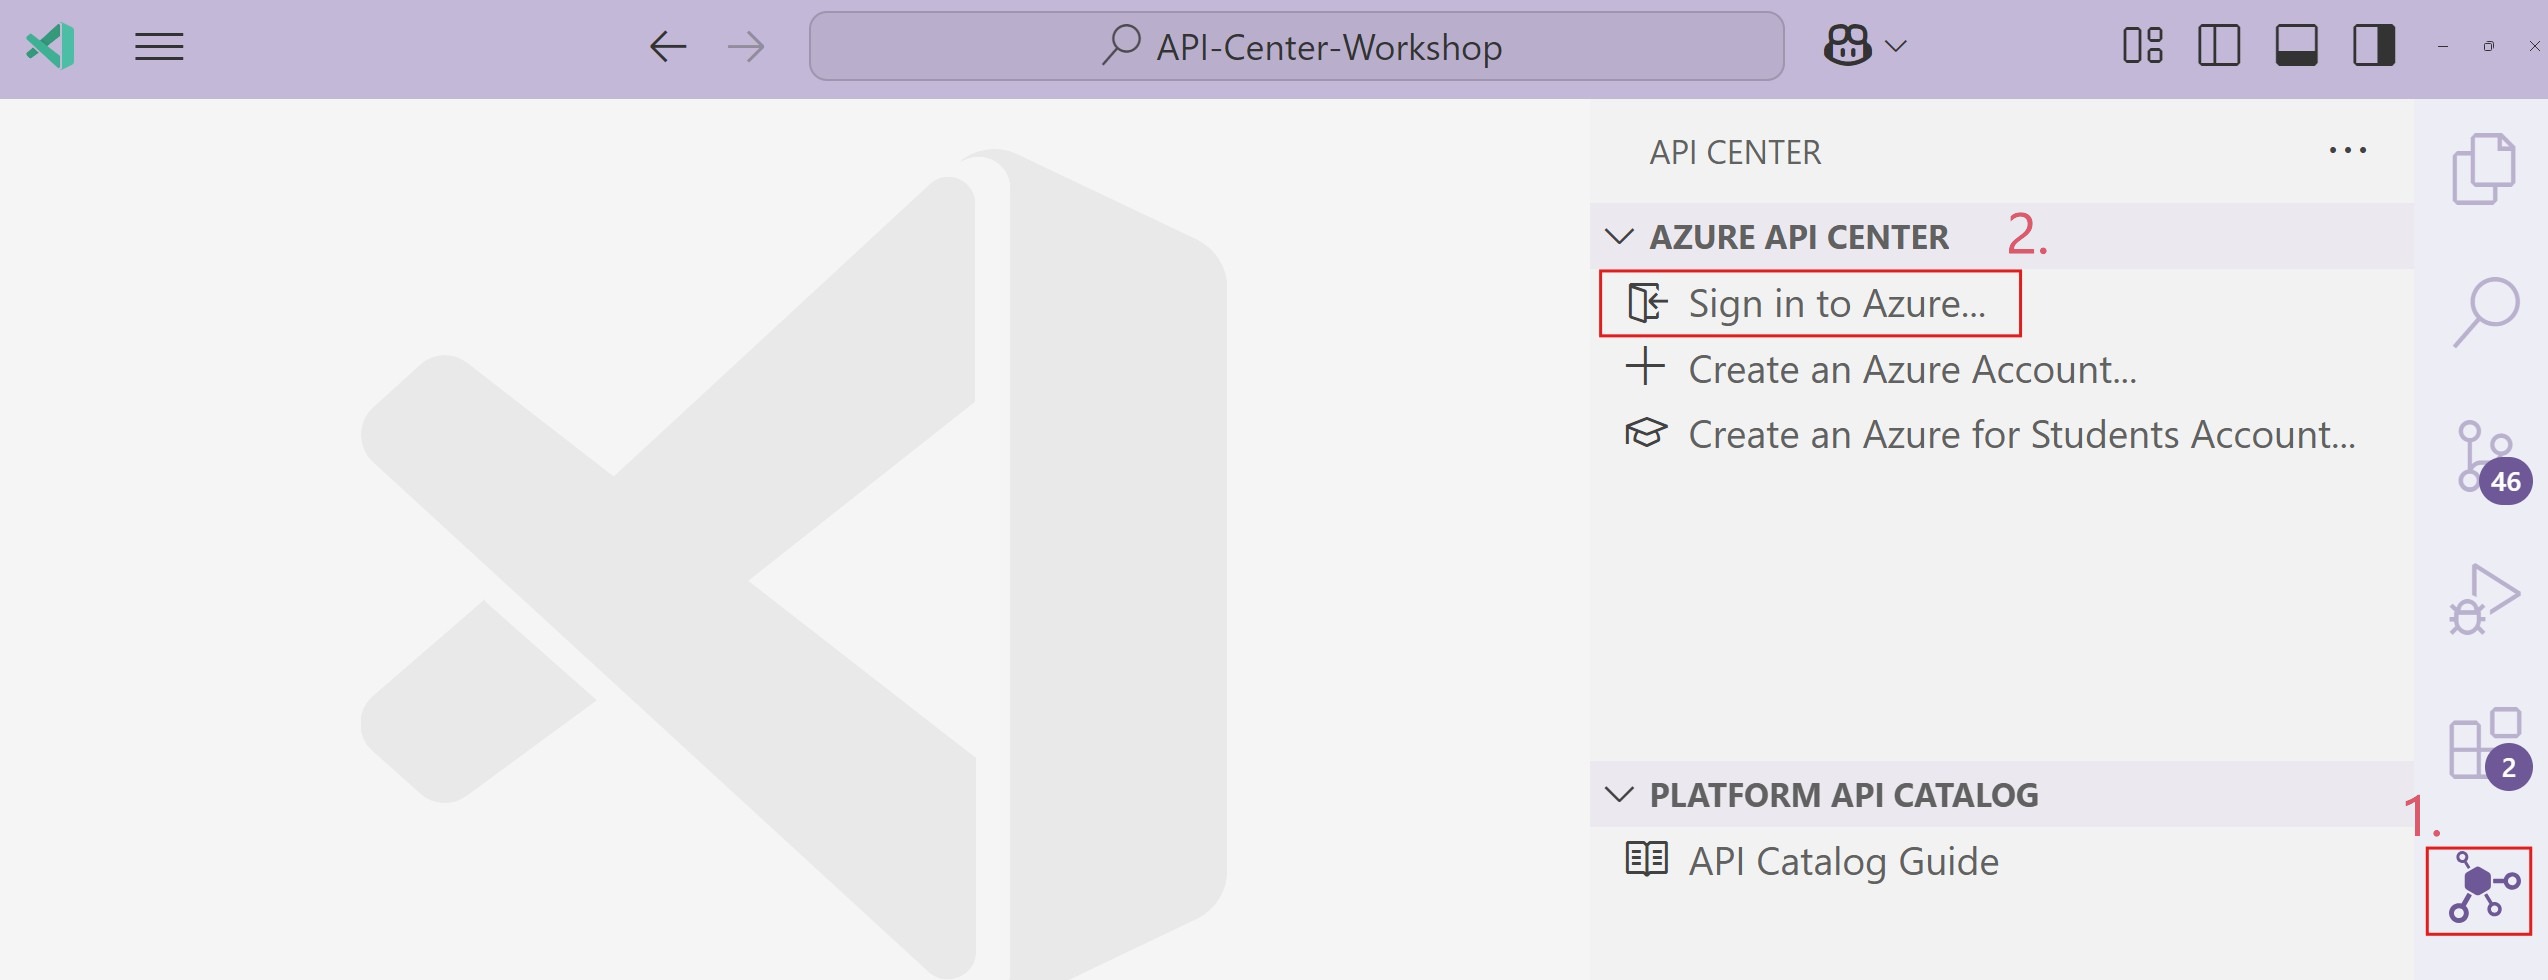
Once installed, click on the API Center icon on the side bar to sign in to your Azure account.
Before you start using API Center, you need to check on the following in your subscription:
- Ensure you at least have a Contributor Role Assignment
- Log in to the Azure CLI (az) usin
az login - Run
az role assignment list --assignee USER-ID --scope /subscriptions/SUBSCRIPTION-IDto confirm your role assignments scoped to your subscription. Replace USER-ID with your User Object ID and SUBSCRIPTION-ID with your subscription ID.
- Log in to the Azure CLI (az) usin
- Register the Microsoft.ApiCenter resource provider
- To register your resource provider, run
az provider register --namespace Microsoft.ApiCenter
- To register your resource provider, run
Now, let's create an Azure API Center service in your subscription. You can create one directly on the Azure Portal, but we will load and use the apic-extension from the Azure CLI by running az apic create --name APIC-NAME --resource-group RG-NAME --location LOCATION
Remember to replace RG-NAME with the name of your resource-group. We'll use contoso-airlines as the APIC-NAME and create it in westeurope
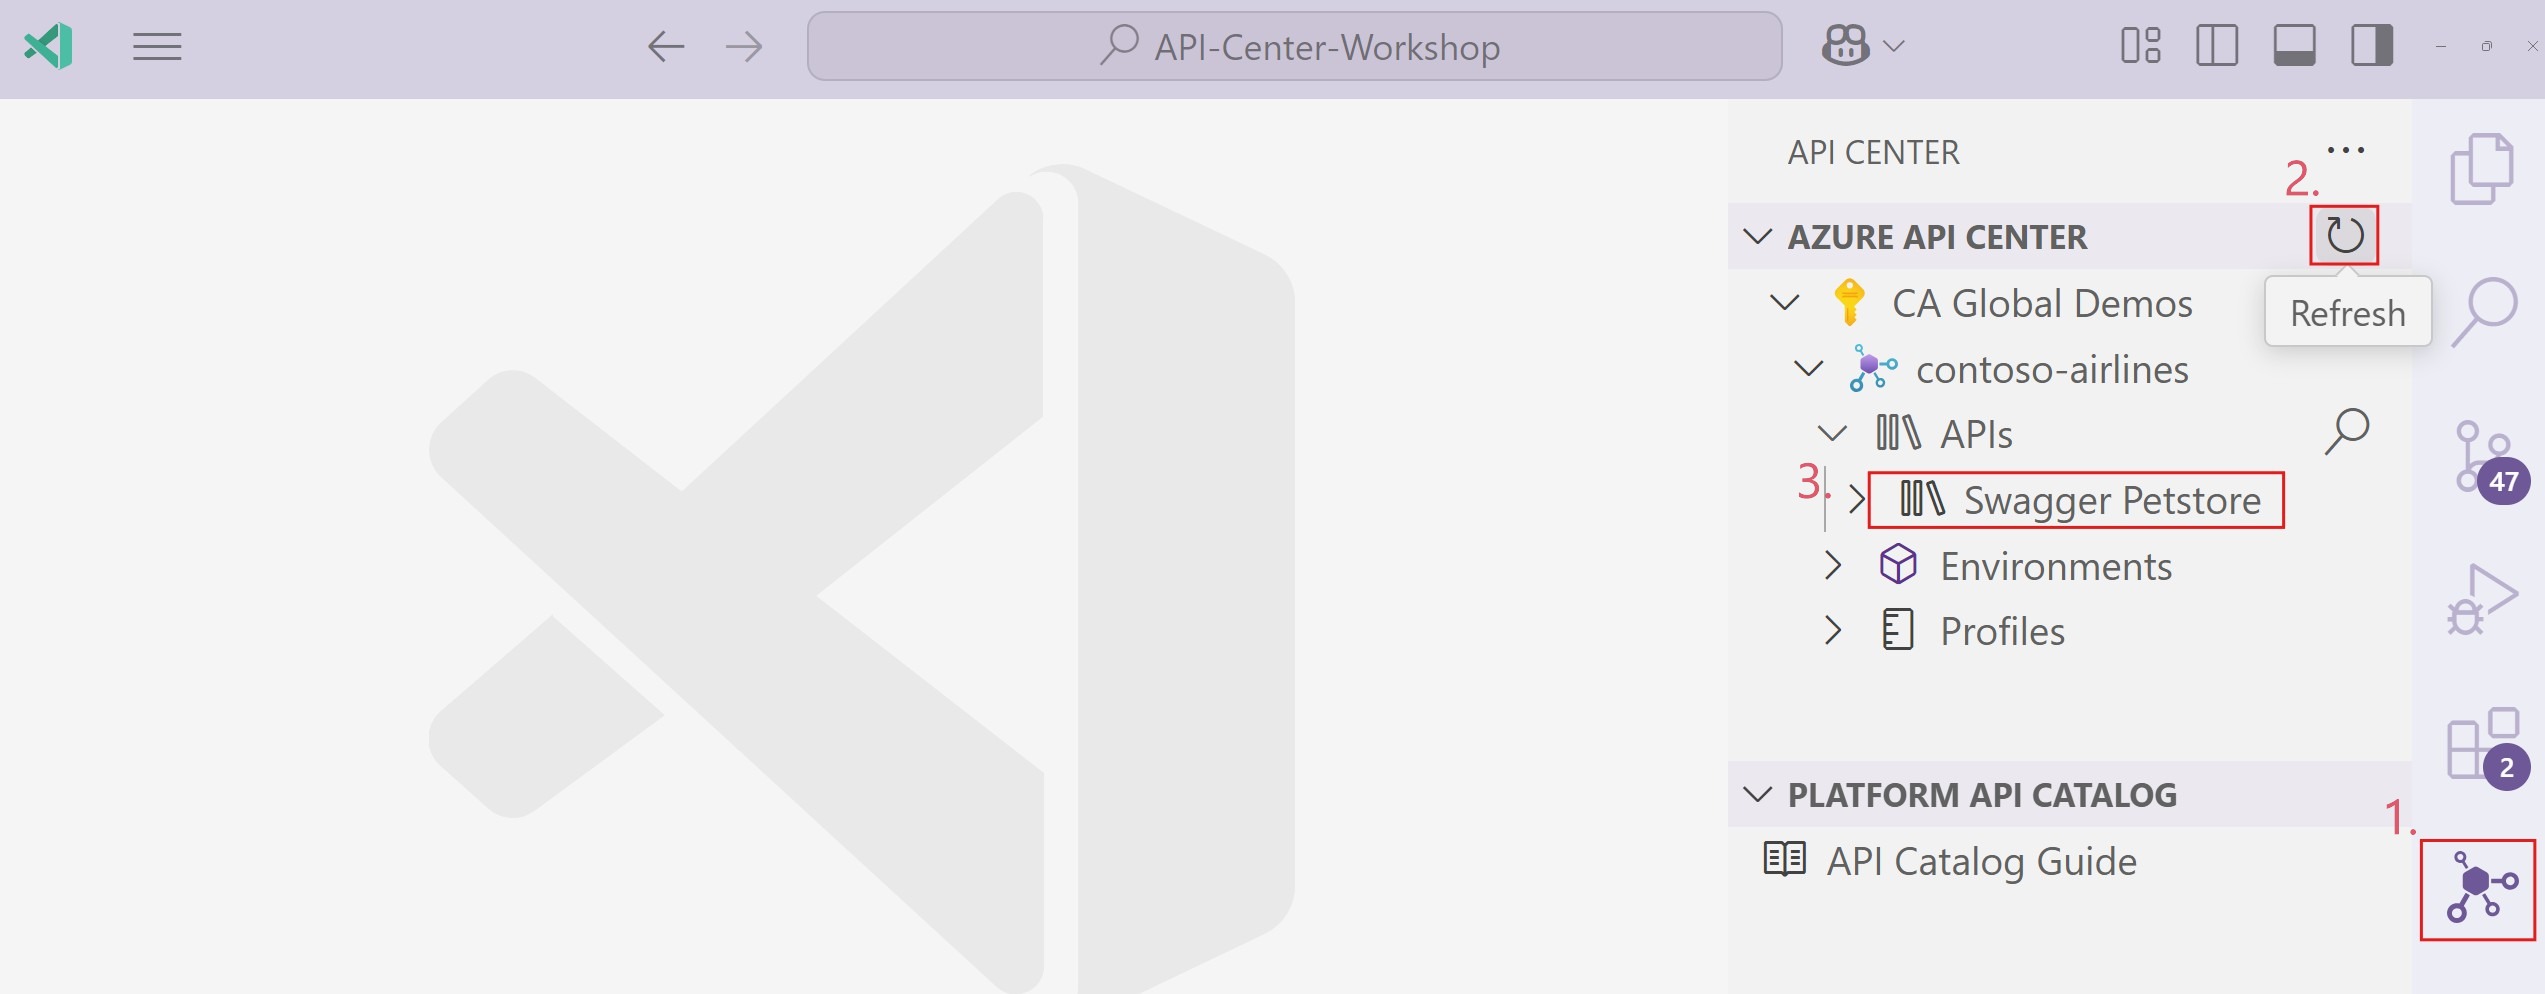
If you click on the API Center extension again, and refresh, you will see your newly created API Center service. Once you expand the service, you will see a sample API, Swagger Petstore, created by default.
Next, we'll define some custom metadata properties to help organize our APIs.