Appearance
Advanced Setup
This section provides advanced setup instructions for running the application either locally or in a containerized environment using Docker. It also covers how to deploy the application to Azure using the Azure Developer CLI (azd) and Bicep infrastructure-as-code configuration.
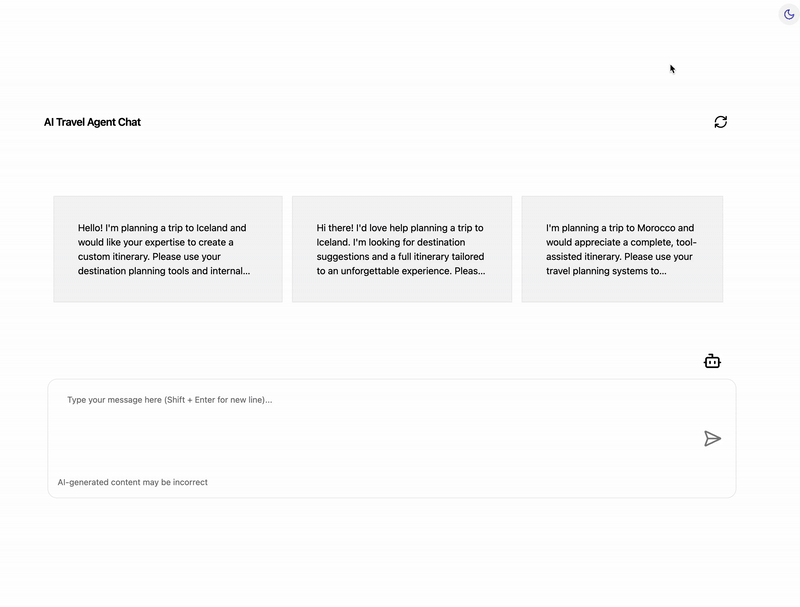
Preview the application
Using Local LLM Providers
If you want to use local LLM providers like Docker models or Llama, you can set the LLM_PROVIDER environment variable in the ./packages/api-{orchestrator}-{language}/.env file to the supported providers. This will configure the application to use the specified local LLM provider.
The application supports the following local LLM providers:
- Foundry Local: This provider allows you to run models locally using Microsoft's Foundry Local service.
- Ollama Models: This provider allows you to run models locally using Ollama service.
- Docker Models: This provider allows you to run models locally using Docker's Model Runner service.
- Make sure to install Docker Desktop v4.42.0 (195023) or later to use this feature (docker engine 28.2.2 or later).
We also recommend you fork the repository to your own GitHub account so you can make changes and experiment with the code.
Using HTTPS
bash
git clone https://github.com/YOUR-USERNAME/azure-ai-travel-agents.gitUsing SSH
bash
git clone git@github.com:YOUR-USERNAME/azure-ai-travel-agents.gitUsing GitHub CLI
bash
gh repo clone YOUR-USERNAME/azure-ai-travel-agentsTo use a local LLM provider, you need to set the LLM_PROVIDER environment variable in the ./packages/api-{orchestrator}-{language}/.env file, and provide the necessary configuration for the provider you want to use.
In order to run the application locally, you need to clone the repository and run the preview script. This will set up the necessary environment and start the application.
Using Foundry Local
Before using Foundry Local, ensure you have the Microsoft's Foundry Local installed and running. You can find a list of available models by running the following command in your terminal:
bash
foundry model listThen set the following environment variables in your ./packages/api-{orchestrator}-{language}/.env file:
bash
LLM_PROVIDER=foundry-local
AZURE_FOUNDRY_LOCAL_MODEL_ALIAS=phi-4-mini-reasoning
Using Docker Models
Prerequisites
- Git (for cloning the repository)
- Node.js (for the UI and API services)
- Docker v4.42.0 or later (for the MCP servers)
- ai/phi4:14B-Q4_0 model (7.80 GB)
- This is the model variant from the Phi-4 family that supports Function Calling which is required for the application to work.
Start the application
- Run the preview script from the root of the project:
For Linux and macOS users
bash
./preview.shFor Windows users
powershell
.\preview.ps1Start the API service by running the following command in a terminal:
bash
npm start --prefix=packages/api-{orchestrator}-{language}
# or
# npm start --prefix=packages/api-{orchestrator}-{language}
# or
# npm start --prefix=packages/api-{orchestrator}-{language}
Open a new terminal and start the UI service by running the following command:
bash
npm start --prefix=packages/ui-{framework}Once all services are up and running, you can access the UI at http://localhost:4200.
You can also view the traces via the Aspire Dashboard at http://localhost:18888.
- On
Structuredtab you'll see the logging messages from the mcp-echo-ping and api services. TheTracestab will show the traces across the services, such as the call from api to echo-agent.
Before using Docker Models, ensure you have the Docker Model Runner installed and running. You can find a list of available models by running the following command in your terminal:
bash
docker model listThen set the following environment variables in your ./packages/api-{orchestrator}-{language}/.env file:
bash
LLM_PROVIDER=docker-models
# DOCKER_MODEL_ENDPOINT=http://model-runner.docker.internal/engines/llama.cpp/v1
# Use the following endpoint if you are running the model runner locally (default port is 12434)
DOCKER_MODEL_ENDPOINT=http://localhost:12434/engines/llama.cpp/v1
DOCKER_MODEL=ai/phi4:14B-Q4_0
Using Ollama Models
Before using Ollama Models, ensure you have the Ollama installed and running. You can find a list of available models by running the following command in your terminal:
bash
ollama listThen set the following environment variables in your ./packages/api-{orchestrator}-{language}/.env file:
bash
LLM_PROVIDER=ollama-models
OLLAMA_MODEL_ENDPOINT=http://localhost:11434/v1
OLLAMA_MODEL=llama3.1
Using GitHub Codespaces
You can run this project directly in your browser by using GitHub Codespaces, which will open a web-based VS Code:

Using a VSCode dev container
A similar option to Codespaces is VS Code Dev Containers, that will open the project in your local VS Code instance using the Dev Containers extension.
You will also need to have Docker installed on your machine to run the container.

Running the MCP servers in a containerized environment
The included MCP servers are built using various technologies, such as Node.js, Python, and .NET. Each service has its own Dockerfile and is configured to run in a containerized environment.
To build and start all MCP servers containers (defined in the docker-compose.yml file), run the following command:
sh
docker compose -f docker-compose.yml up --build -dThis command will build and start all the services defined in the docker-compose.yml file, including the UI and API services.
If you want to run the MCP servers containers only, you can use the following command:
sh
docker compose -f docker-compose.yml up --build -d --no-deps customer-query destination-recommendation itinerary-planning echo-pingAlternatively, if you're in VS Code you can use the Run Task command (Ctrl+Shift+P) and select the Run AI Travel Agents task.
IMPORTANT
When running the application in a containerized environment, you will not be able to make changes to the code and see them reflected in the running services. You will need to rebuild the containers using docker compose up --build to see any changes. This is because the code is copied into the container during the build process, and any changes made to the code on your local machine will not be reflected in the container unless you rebuild it.
Environment Variables setup for containerized services
The application uses environment variables to configure the services. You can set them in a .env file in the root directory or directly in your terminal. We recommend the following approach:
Create a
.envfile for each containerized service for each service, and optionally a.env.dockerfile for Docker-specific configurations:packages/ui-{framework}.envpackages/ui-{framework}.env.dockerpackages/api-{orchestrator}-{language}/.envpackages/api-{orchestrator}-{language}/.envpackages/api-{orchestrator}-{language}/.envpackages/api-{orchestrator}-{language}/.env.dockerpackages/api-{orchestrator}-{language}/.envpackages/api-{orchestrator}-{language}/.env.dockerpackages/mcp-servers/customer-query/.envpackages/mcp-servers/customer-query/.env.dockerpackages/mcp-servers/destination-recommendation/.envpackages/mcp-servers/destination-recommendation/.env.dockerpackages/mcp-servers/itinerary-planning/.envpackages/mcp-servers/itinerary-planning/.env.dockerpackages/mcp-servers/echo-ping/.envpackages/mcp-servers/echo-ping/.env.docker
.env.dockerfiles are used to set environment variables for Docker containers. These files should contain the same variables as.envfiles, but with values specific to the Docker environment. For example:
bash
# packages/*/.env
MCP_CUSTOMER_QUERY_URL=http://localhost:8080

# packages/*/.env.docker
MCP_CUSTOMER_QUERY_URL=http://mcp-customer-query:8080- Load the environment variable files in
docker-compose.ymlusing theenv_filedirective, in the following order:
yml
  services:
    container_name: api-langchain-js
    # ...
    env_file:
      - "./api/.env"
      - "./api/.env.docker" # override .env with .env.docker
NOTE
Adding the - environment: directive to the docker-compose.yml file will override the environment variables set in the .env.* files.
Deploy to Azure
Prerequisites
Ensure you have the following installed before deploying the application:
Deploy the application
To deploy the application to Azure, you can use the provided azd and Bicep infrastructure-as-code configuration (see /infra folder). The azd CLI is a command-line interface for deploying applications to Azure. It simplifies the process of provisioning, deploying and managing Azure resources.
To deploy the application, follow these steps:
- Open a terminal and navigate to the root directory of the project.
- Run the following command to initialize the Azure Developer CLI:
sh
azd auth login- Run the following command to deploy the application:
sh
azd upThis command will provision the necessary Azure resources and deploy the application to Azure. To troubleshoot any issues, see troubleshooting.
Configure environment variables for running services
Configure environment variables for running services by updating main.parameters.json.
Configure CI/CD pipeline
Run azd pipeline config to configure the deployment pipeline to connect securely to Azure.
Deploying with
GitHub Actions: SelectGitHubwhen prompted for a provider. If your project lacks theazure-dev.ymlfile, accept the prompt to add it and proceed with pipeline configuration.Deploying with
Azure DevOps Pipeline: SelectAzure DevOpswhen prompted for a provider. If your project lacks theazure-dev.ymlfile, accept the prompt to add it and proceed with pipeline configuration.
What's included in the infrastructure configuration
Infrastructure configuration
To describe the infrastructure and application, azure.yaml along with Infrastructure as Code files using Bicep were added with the following directory structure:
yaml
- azure.yaml        # azd project configuration
- infra/            # Infrastructure-as-code Bicep files
  - main.bicep      # Subscription level resources
  - resources.bicep # Primary resource group resources
  - modules/        # Library modules
The resources declared in resources.bicep are provisioned when running azd up or azd provision. This includes:
- Azure Container App to host the 'api-{orchestrator}-{language}' services.
- Azure Container App to host the 'ui-*' services.
- Azure Container App to host the 'itinerary-planning' service.
- Azure Container App to host the 'customer-query' service.
- Azure Container App to host the 'destination-recommendation' service.
- Azure Container App to host the 'echo-ping' service.
More information about Bicep language.
Troubleshooting
Q: I visited the service endpoint listed, and I'm seeing a blank page, a generic welcome page, or an error page.
A: Your service may have failed to start, or it may be missing some configuration settings. To investigate further:
- Run
azd show. Click on the link under "View in Azure Portal" to open the resource group in Azure Portal. - Navigate to the specific Container App service that is failing to deploy.
- Click on the failing revision under "Revisions with Issues".
- Review "Status details" for more information about the type of failure.
- Observe the log outputs from Console log stream and System log stream to identify any errors.
- If logs are written to disk, use Console in the navigation to connect to a shell within the running container.
Q: I tried to provision or deploy the application, but it failed with an error.
Deployment Error Details:
InvalidTemplateDeployment: The template deployment 'openai' is not valid according to the validation procedure. The tracking id is 'xxxxxxxx-xxx-xxxx-xxxx-xxxxxxxxxxxx'. See inner errors for details.
SpecialFeatureOrQuotaIdRequired: The subscription does not have QuotaId/Feature required by SKU 'S0' from kind 'AIServices' or contains blocked QuotaId/Feature.
A: This error indicates that the Azure OpenAI service is not available in your subscription or region. To resolve this, you can either:
- Request access to the Azure OpenAI service by following the instructions in the Azure OpenAI Service documentation.
- Change the Azure OpenAI service SKU to a different one that is available in your subscription or region. You can do this by updating the
location(orAZURE_LOCATION) parameter in themain.parameters.jsonfile under theinfrafolder. - If you are using a free Azure subscription, consider upgrading to a paid subscription that supports the Azure OpenAI service.
Q: I deployed the application, but the UI is not loading or showing errors.
A: This could be due to several reasons, such as misconfigured environment variables, network issues, or service dependencies not being available. To troubleshoot:
- Check the logs of the UI service in Azure Portal to see if there are any errors or warnings.
- Ensure that all required environment variables are set correctly in the Azure Portal under the Container App settings.
- Verify that all dependent services (like the API, customer query, etc.) are running and accessible. For more troubleshooting information, visit Container Apps troubleshooting.
Q: Error: FunctionAgent must have at least one tool
A: This error indicates that your MCP servers are not running. Ensure that you have started the MCP servers using the docker compose up command as described in the Running the MCP servers in a containerized environment section. If the services are running, check their logs for any errors or issues that might prevent them from functioning correctly.
Additional information
For additional information about setting up your azd project, visit our official docs.