Deploy your first web app
In this lab, you deploy a simple web app to Azure App Service and open it in your browser. App Service is a fully managed platform for hosting web apps, so you can ship code without managing servers.
You'll build the same result three ways so you can pick the workflow that fits you:
- Azure Developer CLI (azd) - an opinionated, repeatable workflow that provisions infrastructure and deploys code in one step.
- Azure CLI (az) - explicit commands that create each resource and deploy your code.
- Azure portal - a visual, click-through experience.
You can follow the lab in your language of choice: .NET, Node.js, Python, Java, or PHP. Each path calls out the differences between Linux and Windows App Service plans.
This lab is a hands-on, end-to-end walkthrough. For reference depth on any concept, follow the "Learn more" links to the official Microsoft Learn quickstarts.
Estimated time: 15-20 minutes
What you'll build
A single web app running on an App Service plan (the compute that hosts your app), reachable at a default https://<app-name>.azurewebsites.net hostname that returns HTTP 200.
Prerequisites
Before you begin, you will need an Azure subscription with Owner permissions and a GitHub account.
In addition, you will need the following tools installed on your local machine:
- Visual Studio Code with the following extensions:
- Azure CLI
- GitHub CLI
- Git
- Azure Developer CLI (azd)
- The SDK or runtime for your chosen language (.NET SDK, Node.js, Python, JDK + Maven, or PHP - linked in each step)
- POSIX-compliant shell (bash, zsh, Azure Cloud Shell)
Setup Azure CLI
Start by logging into Azure by run the following command and follow the prompts:
az login --use-device-code
You can log into a different tenant by passing in the --tenant flag to specify your tenant domain or tenant ID.
This lab uses the East US region and the B1 (Basic) pricing tier, a low-cost option that's ideal for learning. The F1 (Free) tier also works for the code paths, with some limits. You can change the region to one near you.
Deploy the app
Pick a deployment mechanism, then choose your language. The steps produce an identical running app.
- Azure Developer CLI (azd)
- Azure CLI (az)
- Azure portal
The Azure Developer CLI packages your app code and infrastructure together, then provisions and deploys in one flow. In this lab you use a minimal project: a small app plus a Bicep file that defines the App Service plan and web app.
1. Sign in
azd auth login
2. Create the project structure
Create a new folder and add the four files below. The infra/main.bicep and infra/resources.bicep files are shared across every language - only the app code and two values change per language (the language value in azure.yaml and linuxFxVersion in infra/main.parameters.json).
mkdir my-first-web-app && cd my-first-web-app
mkdir infra src
Create azure.yaml in the project root:
# yaml-language-server: $schema=https://raw.githubusercontent.com/Azure/azure-dev/main/schemas/v1.0/azure.yaml.json
name: my-first-web-app
services:
  web:
    project: ./src
    language: js # change per language: js, dotnet, python, java
    host: appservice
Create infra/main.parameters.json:
{
  "$schema": "https://schema.management.azure.com/schemas/2019-04-01/deploymentParameters.json#",
  "contentVersion": "1.0.0.0",
  "parameters": {
    "environmentName": { "value": "${AZURE_ENV_NAME}" },
    "location": { "value": "${AZURE_LOCATION}" },
    "resourceGroupName": { "value": "${AZURE_RESOURCE_GROUP}" },
    "linuxFxVersion": { "value": "NODE|22-lts" }
  }
}
Create infra/main.bicep. It runs at subscription scope so azd creates and owns the resource group for this environment - the reliable pattern that avoids reusing a shared group:
targetScope = 'subscription'

@description('Name of the azd environment; used to derive resource names.')
param environmentName string

@description('Azure region for all resources.')
param location string

@description('Resource group to create for this environment.')
param resourceGroupName string

@description('Runtime stack for the web app, for example NODE|22-lts or DOTNETCORE|8.0.')
param linuxFxVersion string = 'NODE|22-lts'

resource rg 'Microsoft.Resources/resourceGroups@2024-03-01' = {
  name: resourceGroupName
  location: location
}

module resources 'resources.bicep' = {
  name: 'resources'
  scope: rg
  params: {
    location: location
    environmentName: environmentName
    linuxFxVersion: linuxFxVersion
  }
}

output WEB_URI string = resources.outputs.webUri
Create infra/resources.bicep:
@description('Azure region for all resources.')
param location string

@description('azd environment name used to derive globally unique names.')
param environmentName string

@description('Runtime stack for the web app, for example NODE|22-lts or DOTNETCORE|8.0.')
param linuxFxVersion string = 'NODE|22-lts'

var suffix = uniqueString(subscription().id, resourceGroup().id, environmentName)
var planName = 'plan-${suffix}'
var webName = 'app-${suffix}'

resource plan 'Microsoft.Web/serverfarms@2023-12-01' = {
  name: planName
  location: location
  sku: {
    name: 'B1'
  }
  kind: 'linux'
  properties: {
    reserved: true // required for Linux plans
  }
}

resource web 'Microsoft.Web/sites@2023-12-01' = {
  name: webName
  location: location
  kind: 'app,linux'
  tags: {
    'azd-service-name': 'web' // links this site to the "web" service in azure.yaml
  }
  properties: {
    serverFarmId: plan.id
    httpsOnly: true
    siteConfig: {
      linuxFxVersion: linuxFxVersion
      appSettings: [
        {
          name: 'SCM_DO_BUILD_DURING_DEPLOYMENT'
          value: 'true' // let App Service build the app on deploy (installs dependencies)
        }
      ]
    }
  }
}

output webUri string = 'https://${web.properties.defaultHostName}'
3. Add your app code
Choose your language and add the sample code under src/. Update the language value in azure.yaml and linuxFxVersion in infra/main.parameters.json to match.
- .NET
- Node.js
- Python
- Java
- PHP
Requires the .NET SDK. Set language: dotnet and linuxFxVersion to DOTNETCORE|8.0.
cd src
dotnet new webapp
cd ..
azd builds and publishes the .NET app locally with dotnet publish, then deploys the compiled output. Server-side build would try to compile that output again and fail, so for the .NET variant change the SCM_DO_BUILD_DURING_DEPLOYMENT value in infra/resources.bicep to 'false'. Leave it 'true' for Node.js and Python, which deploy source that App Service builds.
Requires Node.js. Set language: js and linuxFxVersion to NODE|22-lts.
Create src/server.js:
const http = require('http');
const port = process.env.PORT || 3000;
http.createServer((req, res) => {
  res.writeHead(200, { 'Content-Type': 'text/html' });
  res.end('<h1>Hello from Azure App Service!</h1>');
}).listen(port);
Create src/package.json:
{
  "name": "my-first-web-app",
  "version": "1.0.0",
  "main": "server.js",
  "scripts": { "start": "node server.js" },
  "engines": { "node": ">=20" }
}
Requires Python. Set language: python and linuxFxVersion to PYTHON|3.13. Python is supported on Linux plans only.
Create src/app.py:
from flask import Flask
app = Flask(__name__)

@app.route("/")
def home():
    return "<h1>Hello from Azure App Service!</h1>"
Create src/requirements.txt:
flask
gunicorn
App Service auto-detects the app object and starts it with gunicorn.
Requires a JDK and Maven. Set language: java and linuxFxVersion to JAVA|17-java17. Package your Spring Boot app as an executable JAR named app.jar in src/, and rename the built JAR so App Service can find it. For a first Java app, the Maven Plugin for Azure App Service shown in the Azure CLI tab is often simpler.
The minimal azd workflow in this lab doesn't support language: php in azure.yaml (azd has no built-in PHP framework service), so azd up fails for PHP. Use the Azure CLI (az) tab above for the PHP variant of this lab - it deploys PHP to a Linux plan reliably.
4. Create an environment and provision
Create an azd environment with a unique suffix (so the resource group and app names don't collide with earlier runs), then let azd create the resource group and deploy:
SUFFIX=$(openssl rand -hex 3)   # 6 lowercase hex chars
azd env new "my-first-web-app-${SUFFIX}" --location eastus
azd env set AZURE_RESOURCE_GROUP "rg-firstwebapp-${SUFFIX}"
Provision the infrastructure and deploy your code in one step:
azd up
When it finishes, azd prints the app endpoint:
- Endpoint: https://app-<random>.azurewebsites.net/
SUCCESS: Your application was deployed to Azure in 3 minutes 46 seconds.
On the very first azd up, azd occasionally reports unable to find a resource tagged with 'azd-service-name: web' because the provisioning outputs aren't cached yet. If that happens, run azd deploy once more - the resources already exist and the code deploy completes.
azd finds your app by the azd-service-name: web tag. If you deploy more than one azd app into the same resource group, deployment fails with expecting only '1' resource tagged with 'azd-service-name: web', but found '2'. The unique suffix above gives each run its own resource group, which avoids this.
The Bicep in infra/resources.bicep targets Linux. For a Windows plan, remove reserved: true, change kind to app, and replace linuxFxVersion with a Windows setting - for example netFrameworkVersion: 'v8.0' for .NET or nodeVersion: '~22' for Node.js. Python and PHP aren't available on Windows plans.
With the Azure CLI you create each resource explicitly, then deploy your code. This lab uses az webapp create and az webapp deploy (the modern replacements for the deprecated az webapp up).
1. Sign in and set variables
az login
export RESOURCE_GROUP=rg-firstwebapp
export LOCATION=eastus
export APP_NAME=my-first-web-app-$RANDOM
export PLAN_NAME=my-first-plan
2. Create the resource group and plan
az group create --name $RESOURCE_GROUP --location $LOCATION
Create an App Service plan. Use --is-linux for a Linux plan, or omit it for a Windows plan:
- Linux
- Windows
az appservice plan create \
  --name $PLAN_NAME \
  --resource-group $RESOURCE_GROUP \
  --sku B1 \
  --is-linux
az appservice plan create \
  --name $PLAN_NAME \
  --resource-group $RESOURCE_GROUP \
  --sku B1
3. Create the web app, deploy, and browse
Choose your language. List all available runtimes any time with az webapp list-runtimes --os linux (or --os windows).
- .NET
- Node.js
- Python
- Java
- PHP
Requires the .NET SDK. Create and publish a sample:
dotnet new webapp -o app && cd app
dotnet publish -c Release -o publish
cd publish && zip -r ../app.zip . && cd ..
Create the app (Linux uses DOTNETCORE:8.0; Windows uses dotnet:8):
- Linux
- Windows
az webapp create \
  --resource-group $RESOURCE_GROUP \
  --plan $PLAN_NAME \
  --name $APP_NAME \
  --runtime "DOTNETCORE:8.0"
az webapp create \
  --resource-group $RESOURCE_GROUP \
  --plan $PLAN_NAME \
  --name $APP_NAME \
  --runtime "dotnet:8"
Deploy the published output:
az webapp deploy \
  --resource-group $RESOURCE_GROUP \
  --name $APP_NAME \
  --src-path app.zip \
  --type zip
Requires Node.js. Create a minimal app:
mkdir app && cd app
cat > server.js <<'EOF'
const http = require('http');
const port = process.env.PORT || 3000;
http.createServer((req, res) => {
  res.writeHead(200, { 'Content-Type': 'text/html' });
  res.end('<h1>Hello from Azure App Service!</h1>');
}).listen(port);
EOF
cat > package.json <<'EOF'
{ "name": "app", "version": "1.0.0", "main": "server.js", "scripts": { "start": "node server.js" } }
EOF
zip -r app.zip server.js package.json
Create the app (Linux uses NODE:22-lts; Windows uses NODE:22LTS):
- Linux
- Windows
az webapp create \
  --resource-group $RESOURCE_GROUP \
  --plan $PLAN_NAME \
  --name $APP_NAME \
  --runtime "NODE:22-lts"
az webapp create \
  --resource-group $RESOURCE_GROUP \
  --plan $PLAN_NAME \
  --name $APP_NAME \
  --runtime "NODE:22LTS"
Deploy the app:
az webapp deploy \
  --resource-group $RESOURCE_GROUP \
  --name $APP_NAME \
  --src-path app.zip \
  --type zip
Requires Python. Python runs on Linux plans only. Use the official quickstart sample:
git clone https://github.com/Azure-Samples/msdocs-python-flask-webapp-quickstart
cd msdocs-python-flask-webapp-quickstart
Create the app with a Python runtime:
az webapp create \
  --resource-group $RESOURCE_GROUP \
  --plan $PLAN_NAME \
  --name $APP_NAME \
  --runtime "PYTHON:3.13"
Deploy the source; App Service builds it with Oryx (installs requirements.txt):
zip -r app.zip . -x '*.git*'
az webapp deploy \
  --resource-group $RESOURCE_GROUP \
  --name $APP_NAME \
  --src-path app.zip \
  --type zip
Requires a JDK and Maven. The simplest path for Java is the Maven Plugin for Azure App Service, which creates the app and deploys the JAR for you. Clone the quickstart sample:
git clone https://github.com/Azure-Samples/app-service-java-quickstart
cd app-service-java-quickstart/booking-management-slots
Configure and deploy (the plugin prompts for OS, region, and Java version, and supports both Linux and Windows):
mvn com.microsoft.azure:azure-webapp-maven-plugin:2.14.1:config
mvn package azure-webapp:deploy
The plugin prints the app URL when it finishes.
Requires PHP. PHP runs on Linux plans only. Use the official quickstart sample:
git clone https://github.com/Azure-Samples/php-docs-hello-world
cd php-docs-hello-world
Create the app with a PHP runtime:
az webapp create \
  --resource-group $RESOURCE_GROUP \
  --plan $PLAN_NAME \
  --name $APP_NAME \
  --runtime "PHP:8.4"
Deploy the source:
zip -r app.zip . -x '*.git*'
az webapp deploy \
  --resource-group $RESOURCE_GROUP \
  --name $APP_NAME \
  --src-path app.zip \
  --type zip
4. Get the app URL
az webapp show \
  --resource-group $RESOURCE_GROUP \
  --name $APP_NAME \
  --query defaultHostName \
  --output tsv
The Azure portal gives you a visual way to create the web app. You create the app first, then deploy your code from Visual Studio Code.
1. Start creating a web app
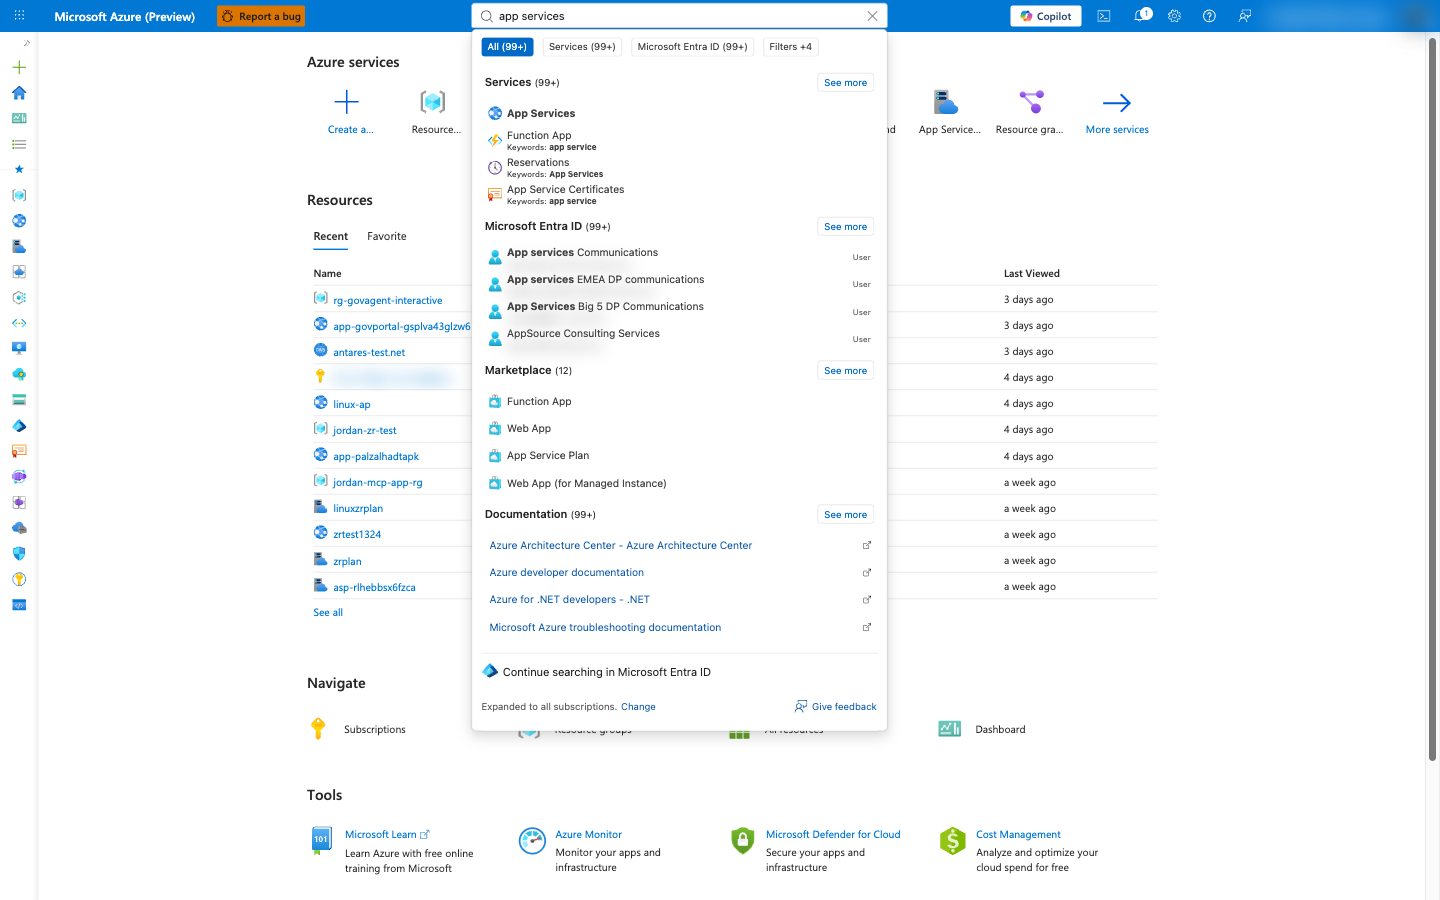
Sign in to the Azure portal. In the top search bar, enter app services, then select App Services. Select Create > Web App.
2. Fill in the Basics tab
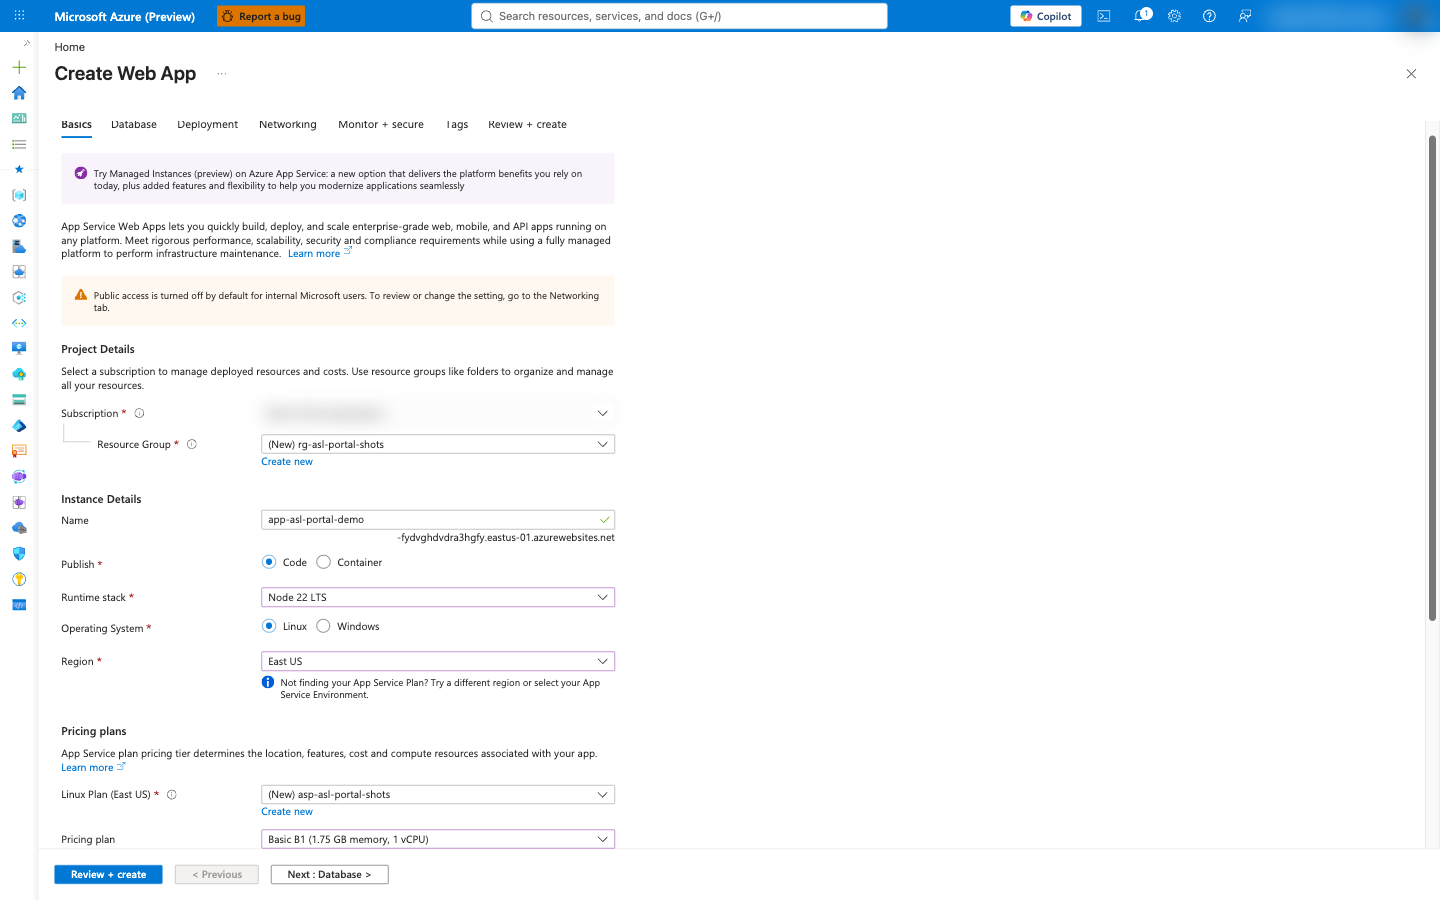
On the Basics tab, enter the following:
- Subscription: your subscription.
- Resource Group: select Create new and enter
rg-firstwebapp. - Name: a globally unique name (this becomes
<name>.azurewebsites.net). - Publish: select Code.
- Runtime stack: choose your language - for example .NET 8 (LTS), Node 22 LTS, Python 3.13, Java 17, or PHP 8.4.
- Operating System: choose Linux or Windows. Python and PHP are available on Linux only.
- Region: East US.
- Pricing plan: select a plan and choose the Basic B1 tier for this lab.
3. Review and create
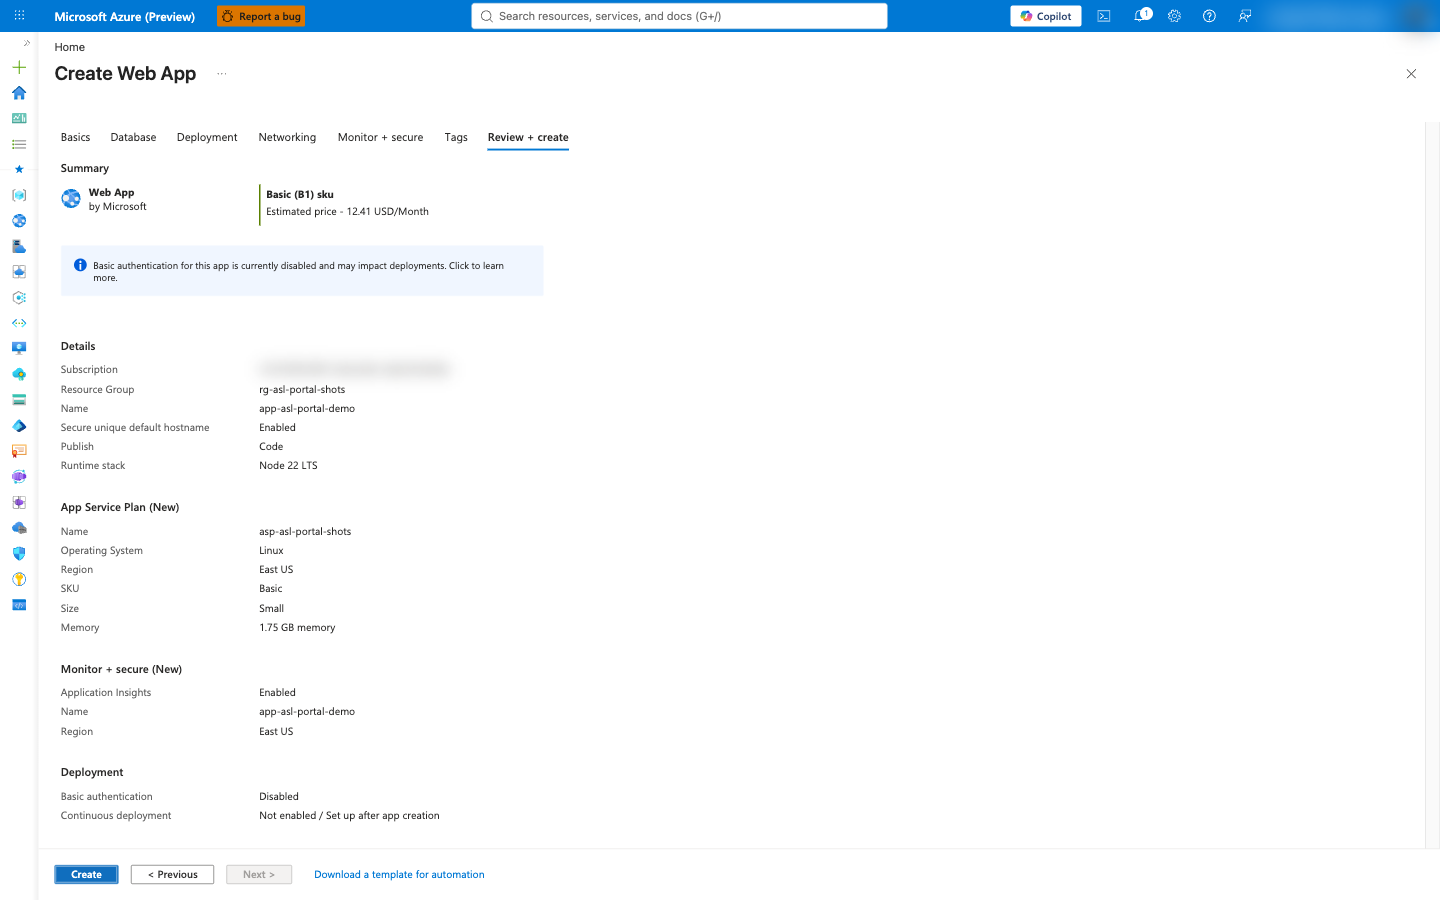
Select Review + create. After validation passes, select Create.
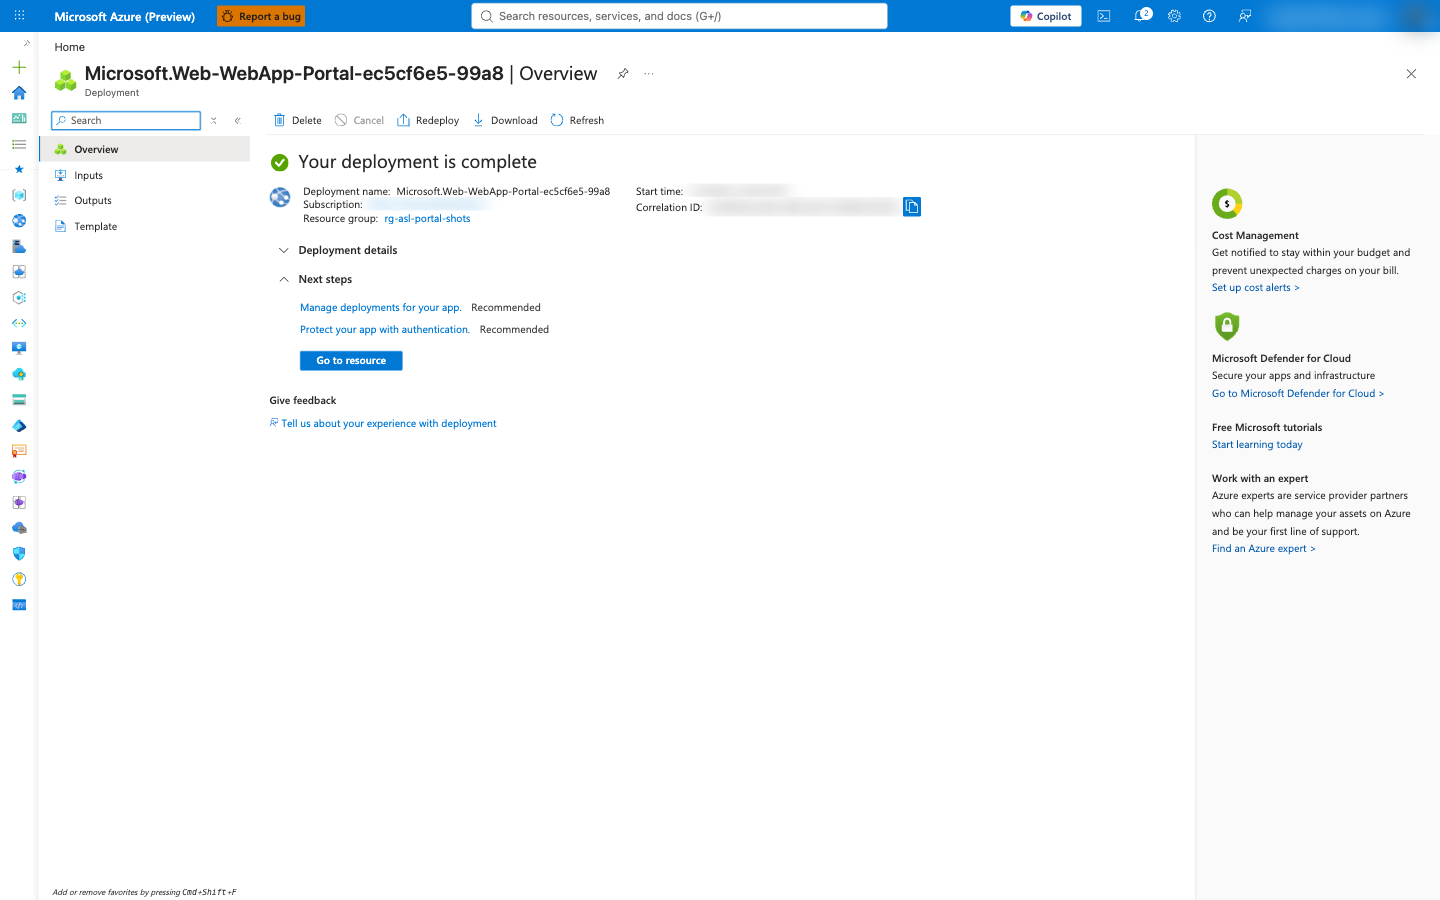
Wait for deployment to finish, then select Go to resource.
4. Deploy your code
A new web app shows a default landing page until you deploy code. The quickest cross-language way is the Azure App Service extension in Visual Studio Code:
- Open your project folder in Visual Studio Code.
- In the Azure view, right-click your app and select Deploy to Web App....
- Select the web app you just created and confirm the deployment.

You can also use Deployment Center in the portal to connect a GitHub repository for continuous deployment, or the Azure CLI / azd paths in the other tabs.
Verify your app is running
Open the app's URL in a browser, or test it from the command line and confirm you get an HTTP 200 response:
curl -I https://<your-app-name>.azurewebsites.net
Expected output (validated during authoring):
HTTP/1.1 200 OK
Content-Type: text/html
You should see your page - for example, Hello from Azure App Service! - or the framework's default start page.
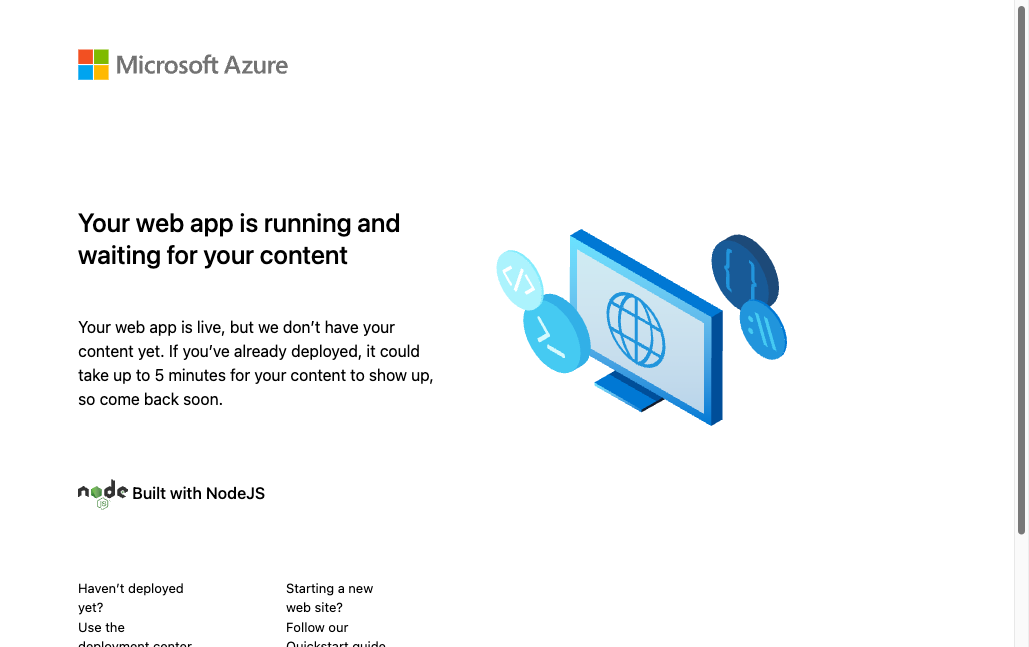
The first request after a deployment may take a few seconds while the app starts. If you see a "starting" or 503 page, wait a moment and refresh.
Clean up resources
To avoid ongoing charges, delete the resources when you're done. Deleting the resource group removes the web app and its App Service plan.
- Azure Developer CLI (azd)
- Azure CLI (az)
- Azure portal
azd down --purge --force
az group delete --name rg-firstwebapp --yes --no-wait
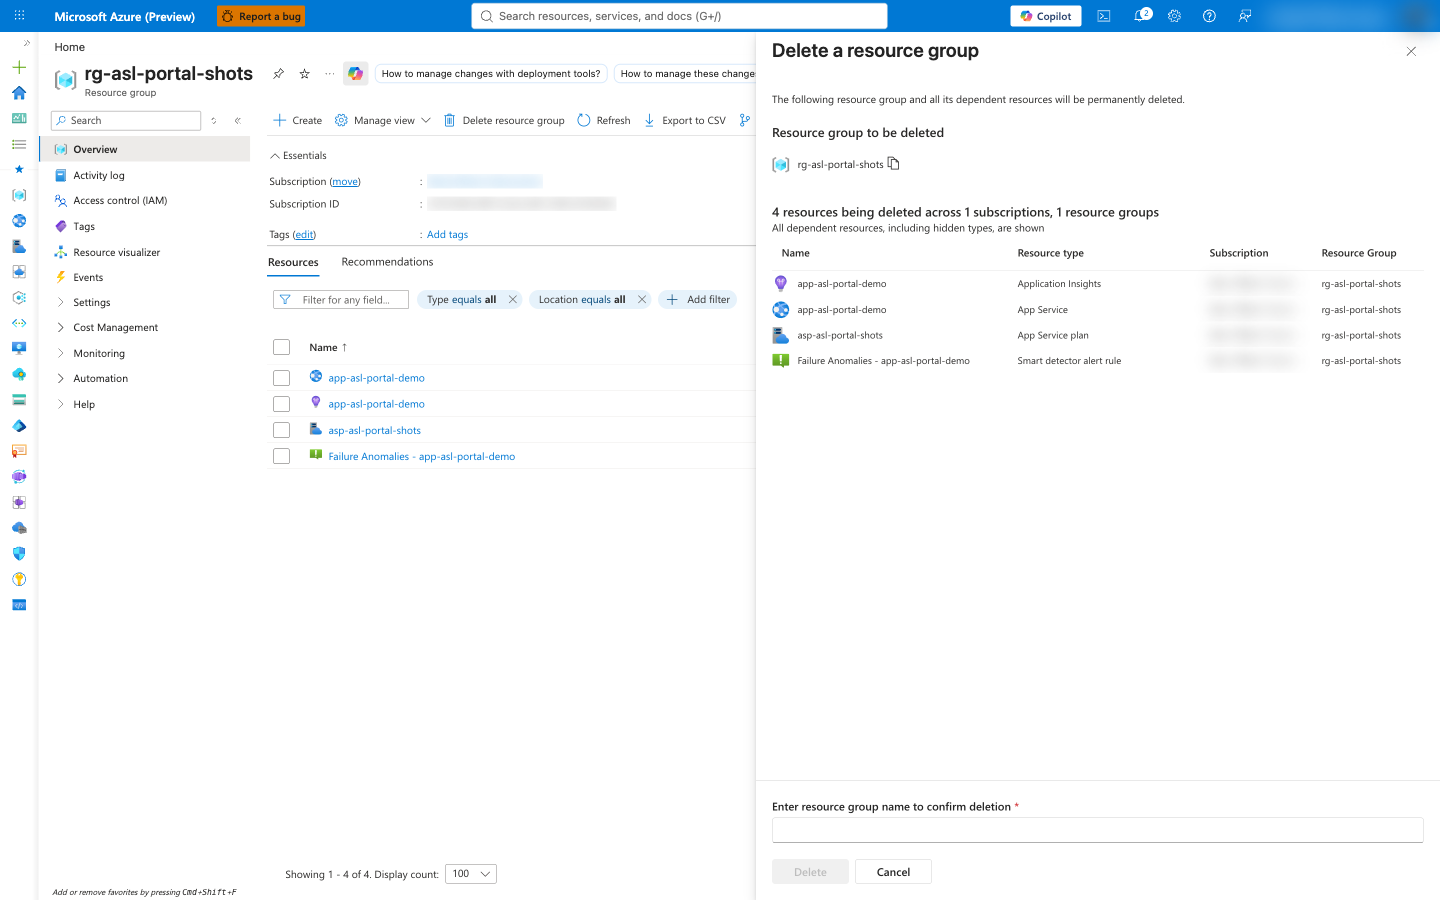
In the portal, open the rg-firstwebapp resource group, select Delete resource group, enter the group name to confirm, and select Delete.
Summary
In this lab, you deployed your first web app to Azure App Service and confirmed it returns an HTTP 200 response. You learned how to:
- Create an App Service plan and web app on both Linux and Windows.
- Deploy code three ways - with the Azure Developer CLI, the Azure CLI, and the Azure portal.
- Choose a runtime stack for .NET, Node.js, Python, Java, or PHP, and where language and OS support differ (Python and PHP are Linux-only).
- Clean up resources to avoid charges.