Setting up the Lab Environment
Prerequisites
Before you begin, you will need an Azure subscription with permissions to create resources and a GitHub account. Using a code editor like Visual Studio Code will also be helpful for editing files and running commands.
Many of the workshops require you to have the AKS Preview extension installed in your subscription. You can check if you have the extension installed by running the following command (make sure you log into Azure first):
az extension list --query "[?name=='aks-preview']"
If the extension is not installed, you can install it using the following command:
az extension add --name aks-preview
Command Line Tools
Many of the workshops on this site will be done using command line tools, so you will need to have the following tools installed:
- Azure CLI
- kubectl
- Git
- Bash shell (e.g. Windows Terminal with WSL or Azure Cloud Shell)
If you are unable to install these tools on your local machine, you can use the Azure Cloud Shell, which has most of the tools pre-installed.
Lab Environment Setup
Many of the workshops will require the use of multiple Azure resources including:
- Azure Log Analytics Workspace for container insights and application insights
- Azure Monitor Workspace for Prometheus metrics
- Azure Managed Grafana for visualizing metrics
- Azure Container Registry for storing container images
- Azure Key Vault for secrets management
- Azure User-Assigned Managed Identity for accessing Azure services via Workload Identity
The resource deployment can take some time, so to expedite the process, we have created an ARM template to deploy those resources.
You must ensure the region where you choose to deploy supports availability zones to demonstrate the concepts in the some of the workshops. You can list the regions that support availability zones using the following command:
az account list-locations --query "[?metadata.regionType=='Physical' && metadata.supportsAvailabilityZones==true].{Region:name}" -o table
In this workshop, we will set environment variables for the resource group name and location. Run the following commands to set the environment variables.
export RG_NAME="myresourcegroup"
export LOCATION="eastus" # Change this to a region that supports availability zones
This will set the environment variables for the current terminal session. If you close the current terminal session, you will need to set the environment variables again.
Run the following command and follow the prompts to log in to your Azure account using the Azure CLI.
az login --use-device-code
If you are logging into a different tenant, you can use the --tenant flag to specify the tenant domain or tenant ID.
Run the following command to create a resource group using the environment variables you just created.
az group create \
--name ${RG_NAME} \
--location ${LOCATION}
Deploy Azure resources using ARM template
We have created an ARM template to deploy the Azure resources needed for the lab environment. The template will deploy the resources listed in the Lab Environment Setup section.
Run the following command to save your user object ID to a variable.
export USER_ID="$(az ad signed-in-user show --query id -o tsv)"
Run the following command to save the deployment name to a variable. In this example we set the deployment name to labdemo.
export DEPLOY_NAME="labdemo$(date +%s)"
Run the following command to deploy Bicep template into the resource group.
az deployment group create \
--name ${DEPLOY_NAME} \
--resource-group ${RG_NAME} \
--template-uri https://raw.githubusercontent.com/azure-samples/aks-labs/refs/heads/main/docs/getting-started/assets/aks-labs-deploy.json \
--parameters userObjectId=${USER_ID} \
--no-wait
The --no-wait flag is used to run the deployment in the background. This will allow you to continue while the resources are being deployed.
This deployment will take a few minutes to complete. Move on to the next section while the resources are being deployed.
Creating an AKS Cluster
Some workshops include steps to create an AKS cluster as part of their instructions. If that's the case, you can skip this section and return to the specific workshop you are working on.
AKS Deployment Strategies
Before deploying an AKS cluster, you should consider how you want to configure it. Factors such as cluster sizing and topology, system and user node pools, and availability zones are a few examples. In this lab you will create an AKS cluster implementing some of the best practices for production clusters. Not all best practices will be covered in this lab, but it will give you a good foundation to build upon.
Size Considerations
Before you deploy an AKS cluster, it's essential to consider its size based on your workload requirements. The number of nodes needed depends on the number of pods you plan to run, while node configuration is determined by the amount of CPU and memory required for each pod. As you know more about your workload requirements, you can adjust the number of nodes and the size of the nodes.
When it comes to considering the size of the node, it is important to understand the types of Virtual Machines (VMs) available in Azure; their characteristics, such as CPU, memory, and disk, and ultimate the SKU that best fits your workload requirements. See the Azure VM sizes documentation for more information.
In your Azure subscription, you will need to make sure to have at least 32 vCPU of Standard D series quota available to create multiple AKS clusters and accommodate node surges on cluster upgrades. If you don't have enough quota, you can request an increase. Check here for more information.
System and User Node Pools
When an AKS cluster is created, a single node pool is created. The single node pool will run Kubernetes system components required to run the Kubernetes control plane. It is recommended to create a separate node pool for user workloads. This separation allows you to manage system and user workloads independently.
System node pools serve the primary purpose of hosting pods implementing the Kubernetes control plane, such as kube-apiserver, coredns, and metrics-server just to name a few. User node pools are additional pools of compute that can be created to host user workloads. User node pools can be created with different configurations than the system node pool, such as different VM sizes, node counts, and availability zones and are added after the cluster is created.
Resilience with Availability Zones
When creating an AKS cluster, you can specify the use of availability zones which will distribute control plane zones within a region. You can think of availability zones as separate data centers within a large geographic region. By distributing the control plane across availability zones, you can ensure high availability for the control plane. In an Azure region, there are typically three availability zones, each with its own power source, network, and cooling.
Creating an AKS Cluster
Now that we have covered the basics of cluster sizing and topology, let's create an AKS cluster with multiple node pools and availability zones.
Before you create the AKS cluster, make sure you have the AKS Preview extension installed in your Azure subscription. See the Prerequisites section for more info.
Before creating the AKS cluster you need to decide on the Kubernetes version to use. It is recommended to use the latest version of Kubernetes available in the region you are deploying to.
You can get the latest version of Kubernetes available in your region by running the following command:
export K8S_VERSION=$(az aks get-versions -l ${LOCATION} \
--query "reverse(sort_by(values[?isDefault==true].{version: version}, &version)) | [0] " \
-o tsv)
If you are planning on doing the cluster upgrades workshop, you will want to use an older version of Kubernetes. To do this, simply specify an index value greater than 0 and less than 4 in the query above.
Run the following command to create an AKS cluster.
AKS_NAME=$(az aks create \
--resource-group ${RG_NAME} \
--name myakscluster \
--location ${LOCATION} \
--tier standard \
--kubernetes-version ${K8S_VERSION} \
--os-sku AzureLinux \
--nodepool-name systempool \
--node-count 3 \
--load-balancer-sku standard \
--network-plugin azure \
--network-plugin-mode overlay \
--network-dataplane cilium \
--network-policy cilium \
--ssh-access disabled \
--enable-managed-identity \
--enable-workload-identity \
--enable-oidc-issuer \
--enable-acns \
--generate-ssh-keys \
--query name -o tsv)
The command above will deploy an AKS cluster with the following configurations:
- Deploy the selected version of Kubernetes.
- Create a system node pool with 3 nodes. This node pool will be used to host Kubernetes control plane and AKS-specific components.
- Use standard load balancer to support traffic across availability zones.
- Use Azure CNI Overlay Powered By Cilium networking. This will give you the most advanced networking features available in AKS and gives great flexibility in how IP addresses are assigned to pods. Note the Advanced Container Networking Services (ACNS) feature is enabled and will be covered later in the workshop.
- Some best practice for production clusters:
- Disable SSH access to the nodes to prevent unauthorized access
- Enable a managed identity for passwordless authentication to Azure services
Not all best practices are implemented in this workshop. For example, you will be creating an AKS cluster that can be accessible from the public internet. For production use, it is recommended to create a private cluster. You can find more information on creating a private cluster here. Don't worry though, more best practices will be implemented as we progress through the workshop 😎
Once the AKS cluster has been created, run the following command to connect to the cluster.
az aks get-credentials \
--resource-group ${RG_NAME} \
--name ${AKS_NAME} \
--overwrite-existing
Adding a User Node Pool
As mentioned above, the AKS cluster has been created with a system node pool that is used to host system workloads. You will need to manually create a user node pool to host user workloads. This user node pool will be created with a single node but can be scaled up as needed.
Run the following command to add a user node pool to the AKS cluster.
az aks nodepool add \
--resource-group ${RG_NAME} \
--cluster-name ${AKS_NAME} \
--mode User \
--name userpool \
--node-count 1
Tainting the System Node Pool
Now that we have created a user node pool, we need to add a taint to the system node pool to ensure that the user workloads are not scheduled on it. A taint is a key-value pair that prevents pods from being scheduled on a node unless the pod has the corresponding toleration. You could taint nodes using the kubectl taint command, but since AKS can scale node pools up and down, it is recommended to use the --node-taints option from the Azure CLI to ensure the taint is applied to all nodes in the pool.
Run the following command to add a taint to the system node pool.
az aks nodepool update \
--resource-group ${RG_NAME} \
--cluster-name ${AKS_NAME} \
--name systempool \
--node-taints CriticalAddonsOnly=true:NoSchedule
This taint will prevent pods from being scheduled on the node pool unless they have a toleration for the taint. More on taints and tolerations can be found here.
Enabling AKS Monitoring and Logging
Monitoring and logging are essential for maintaining the health and performance of your AKS cluster. AKS provides integrations with Azure Monitor for metrics and logs. Logging is provided by container insights which can send container logs to Azure Log Analytics Workspaces for analysis. Metrics are provided by Azure Monitor managed service for Prometheus which collects performance metrics from nodes and pods and allows you to query using PromQL and visualize using Azure Managed Grafana.
The Bicep template that was deployed earlier should be completed by now. All you need to do next is enable metrics monitoring and on the cluster by linking the monitoring resources to the AKS cluster.
The Bicep template has outputs defined so you can access the names and resource IDs of the monitoring resources. However, the outputs are stored as key-value pairs. You can use this scriptlet to export the outputs as environment variables.
while IFS= read -r line; \
do echo "exporting $line"; \
export $line=$(az deployment group show -g ${RG_NAME} -n ${DEPLOY_NAME} --query "properties.outputs.${line}.value" -o tsv); \
done < <(az deployment group show -g $RG_NAME -n ${DEPLOY_NAME} --query "keys(properties.outputs)" -o tsv)
The output shows the names environment variables being exported so you can use them later and looks like this:
exporting metricsWorkspaceId
exporting grafanaDashboardId
exporting grafanaDashboardName
exporting logWorkspaceId
exporting azureKeyVaultId
exporting azureKeyVaultName
exporting azureKeyVaultUri
exporting containerRegistryId
exporting containerRegistryUrl
exporting appInsightsConnectionString
Run the following command to enable metrics monitoring on the AKS cluster.
az aks update \
--resource-group ${RG_NAME} \
--name ${AKS_NAME} \
--enable-azure-monitor-metrics \
--azure-monitor-workspace-resource-id ${metricsWorkspaceId} \
--grafana-resource-id ${grafanaDashboardId} \
--no-wait
Run the following command to enable the monitoring addon which will enable logging to the Azure Log Analytics workspace from the AKS cluster.
az aks enable-addons \
--resource-group ${RG_NAME} \
--name ${AKS_NAME} \
--addon monitoring \
--workspace-resource-id ${logWorkspaceId} \
--no-wait
More on full stack monitoring on AKS can be found here
Deploying the AKS Store Demo Application
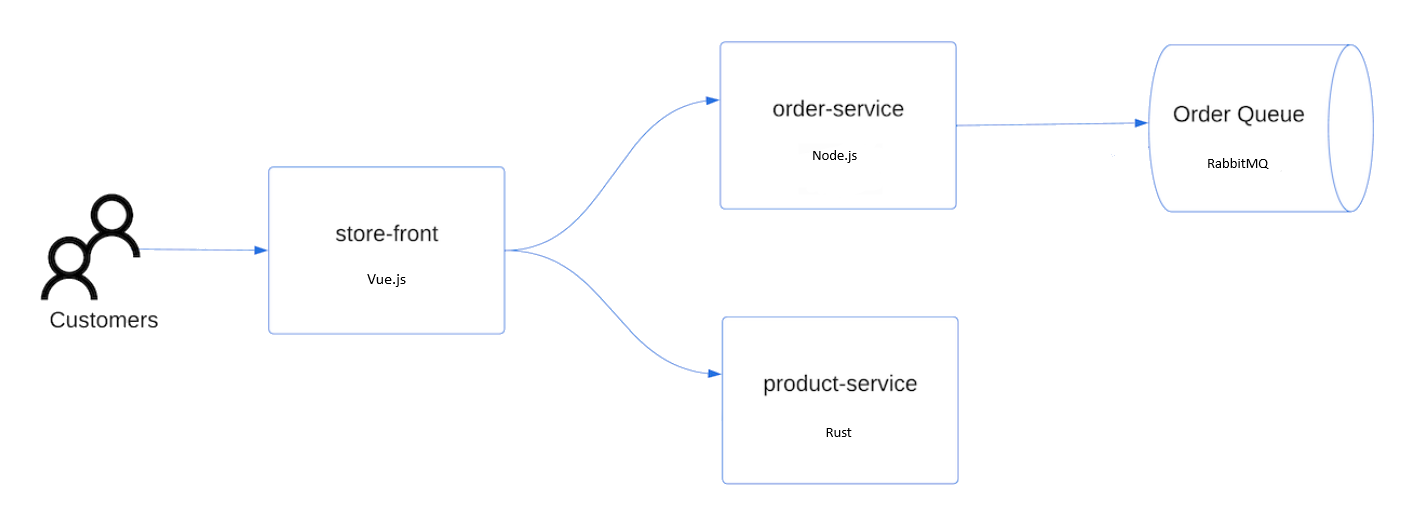
This workshop will have you implement features and test scenarios on the AKS cluster. To do this, you will need an application to work with. The AKS Store Demo application is a simple e-commerce application that will be used to demonstrate the advanced features of AKS.
The application has the following services:
| Service | Description |
|---|---|
| store-front | Web app for customers to place orders (Vue.js) |
| order-service | This service is used for placing orders (Javascript) |
| product-service | This service is used to perform CRUD operations on products (Rust) |
| rabbitmq | RabbitMQ for an order queue |
Here is a high-level architecture of the application:
Run the following command to create a namespace for the application.
kubectl create namespace pets
Run the following command to install the application in the pets namespace.
kubectl apply -f https://raw.githubusercontent.com/Azure-Samples/aks-store-demo/refs/heads/main/aks-store-quickstart.yaml -n pets
Verify the application was installed with the following command.
kubectl get all -n pets
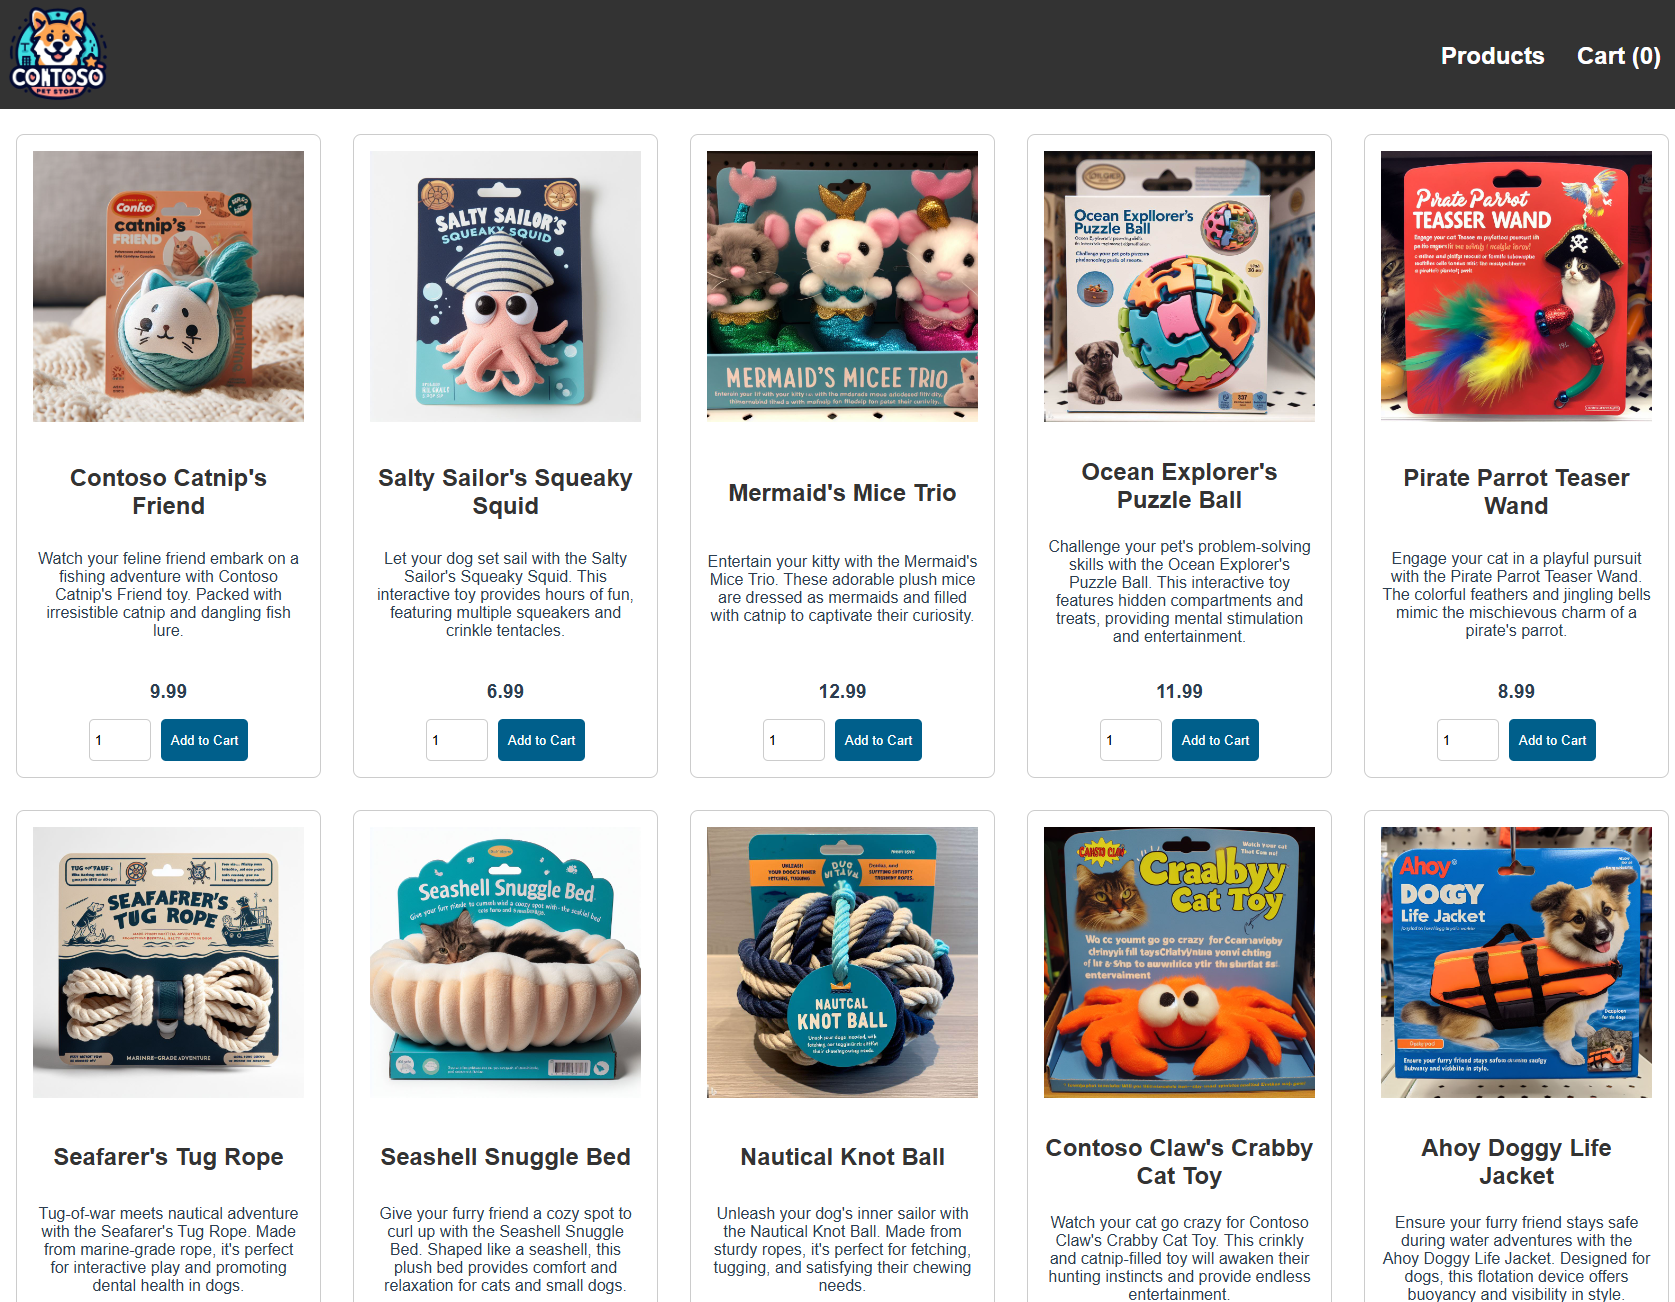
The application uses a LoadBalancer service to allow access to the application UI. Once you have confirmed all the pods are deployed, run the following command to get the storefront service IP address.
kubectl get svc store-front -n pets
Copy the EXTERNAL-IP of the store-front service to your browser to access the application.
You have now created an AKS cluster with some best practices in place such as multiple node pools, availability zones, and monitoring. You have also deployed an application to work with in the other workshops.
At this point, you can jump into any of the workshops and focus on the topics that interest you the most.